Scott Hanselman

My next PC will be an Ultrabook

December 05, 2012 Comment on this post [114] Posted in Reviews
Sponsored By

Darn it all. I didn't want to like this little computer. I've always been a "MOAR POWER" laptop user. For me, laptops are desktop replacements. It's less about the carrying and more about the "setting up in a remote place and having all the power of your desktop." My main laptop has been a Lenovo W520 for years. It's got dual SSDs, 8 (logical) processors and 16 gigs of RAM.

But lately I haven't even turned it on. I have a MacBook Pro but it also goes unused. I've been using this little Intel Ultrabook prototype near-exclusively for months and I've gotten to the point where I've decided that my next machine will be ultralight.

The Good

  • You really can get good power and responsiveness out of a 3lb machine.
  • Don't knock a touchscreen until you've used one. Every laptop should (and will) have a touch screen in a year. Mark my words. This nonsense about how your arm will hurt assumes that you're only using it. A touchscreen is complementary not primary. I use it for pinching, for scrolling web pages, and for launching apps. It's much faster to just touch the icon than to mouse over to click one.
  • Not thinking about memory. I am shocked but I have only 4 gigs of RAM on this machine. I didn't think that would be enough to get anything done. However, I've been able to run Hyper-V VMs, do Windows Phone 8 development, run multiple copies of Visual Studio along with Outlook and have had no problems. I think that a fast SSD along with a fast processor as well as an OS that manages memory more aggressively (Windows 8) adds up to a situation where anything around 4 gigs is sufficient, even for me.

The Bad

  • Flaky drivers. As I said, I'm using a hardware prototype but the drivers for this device are flaky. The WiFi and WebCam are both goofy and a little unreliable. I'm not worried about it and neither have really caused me any trouble other than a reboot twice a week.
  • Mini HDMI. I find the lack of a proper VGA port to be irritating and mini HDMI just isn't physically strong enough to support the dongles I need for presenting and I am always worried I'll one day break the port.

That's about it. Otherwise my experience with an Ultrabook has been rock solid.

Two of the machines I'm looking at getting are one of these.

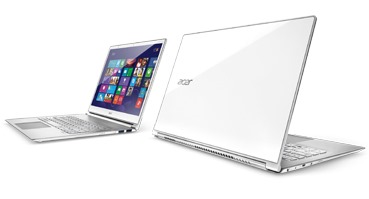
The Acer S7. Small, light, touchscreen, backlit keyboard, cool on the lap.

S7-Benefit-images-1

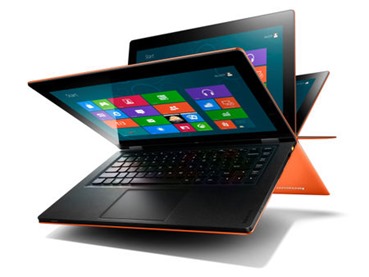
The Lenovo Ideapad Yoga. It has a hinge that supports a use as regular laptop, a tablet, a stand (or as a "tent") for movies on a plane or presentations. I'm leaning in this direction.

ideapad-lenovo-ideapad-yoga-13,P-X-356037-13

I'll want to get an i7 rather than an i5 processor. If possible I will want a 1080p display, so I'm hoping the Yoga adds screen resolution, although, I've been running 1600x900 on this Intel and it seems OK. I just like the idea of 1080p and True HD.

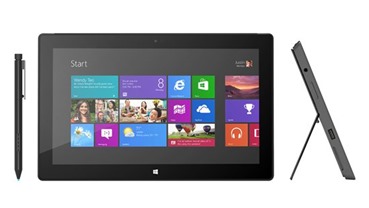
The Surface Pro (with Type Cover). The Touch Cover is cute, but I want a laptop more than I want a tablet. This device has the benefits of being a 1080p screen, runs all my Windows apps. It's an i5 which gives me pause, although it's only 2 lbs.

3286.Surface_Pro.jpg-550x0

What Ultrabooks are you looking at?

Related Links

Disclosure of Material Connection: Intel sent me this Ultrabook for free in the hope that I would review it on my blog. Regardless, I only recommend products or services I I would use and think you would find useful. I am disclosing this in accordance with the Federal Trade Commission’s 16 CFR, Part 255: “Guides Concerning the Use of Endorsements and Testimonials in Advertising.

About Scott

Scott Hanselman is a former professor, former Chief Architect in finance, now speaker, consultant, father, diabetic, and Microsoft employee. He is a failed stand-up comic, a cornrower, and a book author.

facebook bluesky subscribe
About   Newsletter
Hosting By
Hosted on Linux using .NET in an Azure App Service

Nest Thermostat Review 2nd Generation - Every consumer electronic device should be this polished

November 25, 2012 Comment on this post [75] Posted in Reviews
Sponsored By

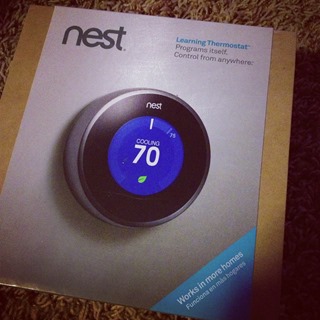
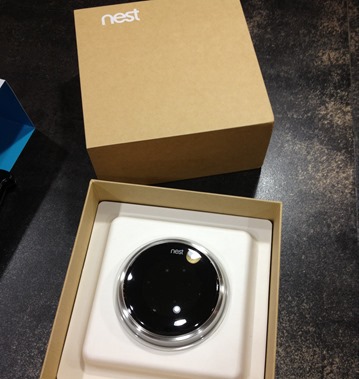
Nest in the boxLast year I purchased and installed a 3M Filtrete Touchscreen WiFi-Enabled Programmable Thermostat and have generally been very happy with it. It's not automatic, but it's programmable and it has a remote control iPhone app and a very nice programmable web API. Since I work at home, sometimes I am in my home office and other times I'm in a local coffee shop, and in these instances I just use the phone to turn off heat as I leave.

More recently I've been hearing about the Nest Learning Thermostat. There are two generations, Nest Gen 1 and Nest Gen 2 which is 20% thinner than the first Nest and includes support for 95% of North American heating and cooling systems.

I saved up and bought one. It's great.

OOBE - Out of Box Experience

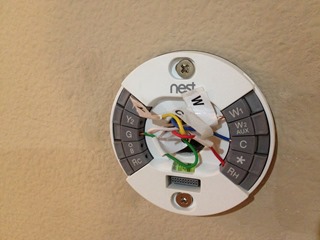
When you spend $200 or more on a Thermostat you're expecting to be impressed. The entire experience from unboxing through installation and usage is absolutely top notch. There's an online Nest Compatibility Tool you can use to check if you've got the right wires for Nest to work with your heating and cooling system. If that doesn't cut it, you are invited to take picture (!) of your setup and send it to them. Classy.

Unboxing the Nest, just like unboxing an iPhone HAL from 2001: Space Odyssey

Unboxing it is like unboxing an iPhone or high end receiver. It's like unboxing HAL from 2001: A Space Odyssey, in fact, which is pretty awesome.

Installation

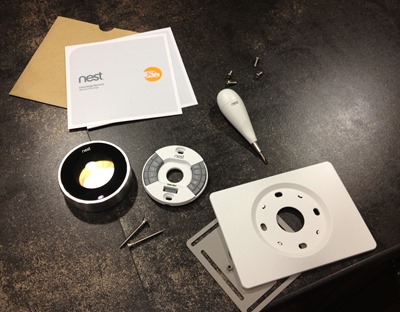
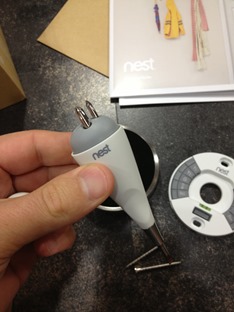
The box includes every piece of hardware you could need. Even the tiny screwdriver they included is brilliant. It's got 4 magnetic tips and it's become my favorite screwdriver for small computer stuff and I've taken to keeping it on my desk. It may seem a small thing, but think about that for a second. Someone decided to make and ship an awesome screwdriver. I love that.

There's a rectangular back plate included that can be used to cover holes from your previous installation.

All the things that come with your Nest. The Nest itself, the wallplates, instructions and screwdriver Checking out the amazing tiny screwdriver the Nest guys included

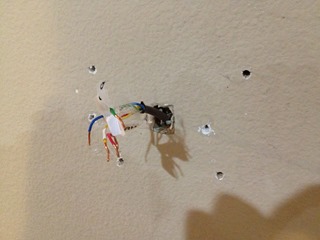
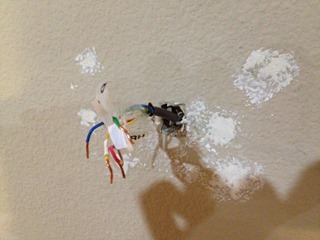
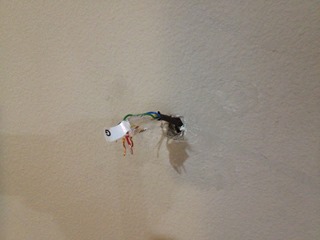
I went back and forth about using the back plate and came to the conclusion that a thermostat this fancy deserved a few hours of extra effort. I could have slapped the back plate on the wall and been done in minutes but instead I took a little bit of putty/spackle, filled the holes left from the previous thermostat and painted with a small modeler's paintbrush.

Take the Time and Paint

I am EXTREMELY happy and a more than little proud of the results.

Removing the original thermostat Puttying over the holes

Painting over the puttied holes Adding the Nest round cover

Connect the Network

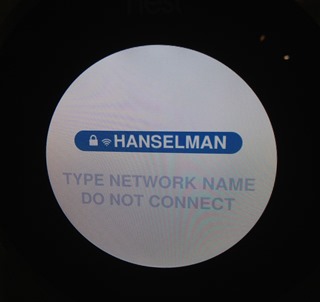
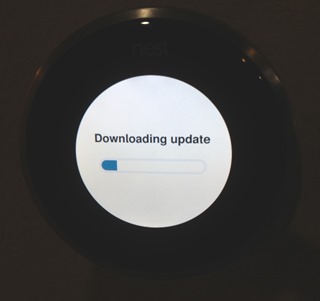
You snap the Nest onto the round backing and it immediately turns on. You rotate the Nest's outer ring to make selections and you press in to make a selection. My Nest needed to update itself and apparently Nests will auto-update without you having to do anything but wait a bit.

IMG_2494 IMG_2495

The Good (there's been Zero Bad)

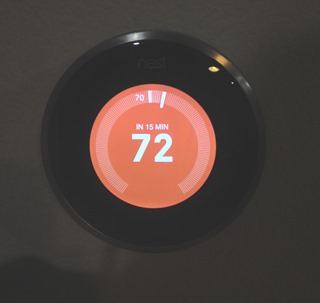
The Nest tells me it will get 72 degrees in 15 minutesI've had the Nest for a few weeks now and while I can't tell if it's saved me a pile of money yet, I can note a number of significant things that have made a difference to me and the family.

  • I've had to fiddle with the Nest much LESS than my previous wireless thermostat. We used to adjust the Filtrete a few times a day. I had created a schedule but it couldn't handle how I'd leave sometimes at random.
  • My wife gets it more than the previous thermostat because it's extremely simple. The Filtrete required several button pushes to change the temperature and the scheduler was circa a 1900s LCD VCR.
  • The auto-away feature is almost worth the price of admission. Our thermostat is located in our Family Room near the door we use to enter and exit the house. Auto-away works fantastically and exactly as you'd think it should.
  • The Nest is dark until you walk up to it. It turns on the display literally as you approach. It's fun to walk by it.
  • It tells you how long it will take for the house to reach a certain temperature because it learns how long your house takes to move temperatures. My wife used to turn the thermostat really hot because she thought that if she set it to 80 then it would get to 72 faster. The Nest solves that problem by telling her it will reach 72F in 15 minutes.

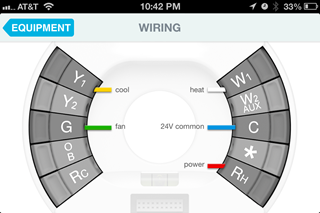
The Nest app is as well-designed as the Next, or more so. The Nest is simple and hides complexity but if you go digging and WANT to see what the underbelly looks like, it hides little. You can get details on the wiring - now hidden physically but visible virtually.

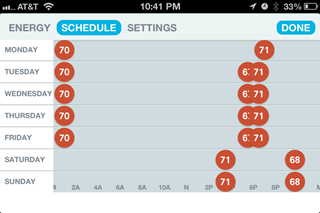
You can see the schedule that the Nest automatically gleaned based on yours and your family's behaviors. For the first week you are asked to adjust the Nest as much as you like in order to teach it about your preferences. It uses this data, combined with local weather and noticing if you leave to build a schedule. It also overrides that schedule liberally using auto-away.

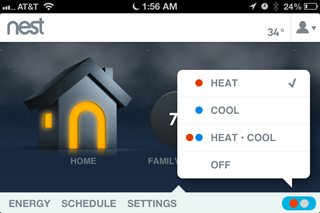
Screenshot of the Nest App showing wiring Screenshot of the Nest App showing Heat/Cool

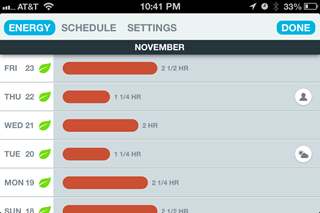
The Nest is kind of the Prius of home thermostats, and I say that as a happy Prius owner. It make saving (or trying to save) energy a game. It'll show a leaf when you are choosing temperatures that can save energy. In the fourth screenshot you can see an icon on Thursday that indicated that I adjusted it manually and caused an energy savings. On Tues the weather was warmer than expected and caused the Nest to save energy.

Screenshot of the Nest App showing Schedule Screenshot of the Nest App showing Energy

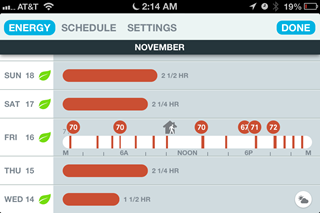
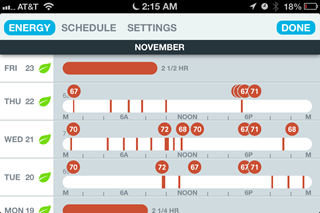
You can zoom in on any of these graphs and get LOTS of details. You can see here that I left for lunch at Noon on Friday.

Nest noticed that I went to lunch and adjusted the temperature Wednesday was a complex day

The best thing about the Nest. It's simple and its simplicity hides enormous complexity. It's a luxury item, to be sure, but it's a joy to use. I'm impressed and I suspect that when a Nest is $100 at Home Depot that they'll own the market.

I'll update the post in a few months when I have several heating bills.


PLUG: My friend Luvvie and I talk about the Nest in Episode 2 of our new bi-weekly Podcast, "Ratchet and The Geek." Check it out!

About Scott

Scott Hanselman is a former professor, former Chief Architect in finance, now speaker, consultant, father, diabetic, and Microsoft employee. He is a failed stand-up comic, a cornrower, and a book author.

facebook bluesky subscribe
About   Newsletter
Hosting By
Hosted on Linux using .NET in an Azure App Service

How to set up CrashPlan Cloud Backup headless on a Synology NAS - Backup Strategies

November 18, 2012 Comment on this post [163] Posted in Tools
Sponsored By

NOTE: This article has been upgraded for Synology systems that are running DSM 5.0!

Scott Hanselman's Personal Backup StrategyAt home I use a Synology 1511+ NAS (Network Attached Storage) server for all my family's digital things. The Synology gives me virtually all the features I had when I was in love with the Windows Home Server. I can add a drive of any size and get more storage, I can install add-in packages for more functionality, and most importantly, everything has multiple copies. I've even lost a whole drive and just repaired it by pulling it out and replacing it.

I have four 2TB drives in my Synology giving me approximately 5TB of redundant space.

However, the lack of a good integrated cloud storage setup has been a frustration. The Synology does support Amazon S3 as a remote backup location, but I find the opacity of my digital blobs in Amazon's S3 buckets systems frustrating. S3 is great, but it's not an awesome cloud backup experience like some of the more consumer focused backup systems like CrashPlan* or BackBlaze. Sure, these guys might use S3 underneath, but as a consumer (or pro-sumer) I don't need to know or see that.

Here's my current Backup Strategy. There are also non-cloud-based backup strategies if you don't have persistent fast internet. You can see how my strategy has changed since my 2007 Backup Strategy, but not much.

Any good backup strategy follows the Backup Rule of Three.

  • 3 copies of anything you care about - Two isn't enough if it's important.
  • 2 different formats - Example: Dropbox+DVDs or Hard Drive+Memory Stick or CD+Crash Plan, or more
  • 1 off-site backup - If the house burns down, how will you get your memories back?

More importantly a good backup strategy "Just Works" and Doesn't Require Much Thought. If you have to think about it, it is likely to be forgotten. Everything should be automated. I like that DropBox is automatic, the Synology can backup to another external automatically, so I only have to think about rotating drives off-site every month, or at least a few times a year.

The missing piece since I got the Synology has been a completely silent cloud archive. Running CrashPlan headless (headless - there is no monitor) has been the final piece I needed for a simple process that requires no effort on my part.

Step by Step: How to run CrashPlan on your Synology NAS

This gentleman at PCLoadLetter has prepared excellent packages that make it MUCH easier than before to get CrashPlan running on your Synology. However, his instructions assume a some technical ability and also require reading a LOT and visiting several pages within his site. It took me about an hour to really understand what was being said. Here's my simplified version of How To get CrashPlan* on your Synology.

1. Turn on the "User Homes Service" on your Synology

Log in to your Synology from a web browser. Mine is http://server. Go to the Control Panel, then User, then User Home and click "Enable User Home Service." This will give the future "crashplan" user a "place to live."

Turning on the user home service

2. Ensure you have a share called "public" with full for users access

Later when we run the CrashPlan package, it will expect the Java package to live in \\yourserver\public. Make sure you have a public share. I choose also to hide mine since I'll never use it and don't want to confuse my other users.

Make a public share

3. Download the right version of Java for your CPU from the Oracle Website

CrashPlan is written using the Java environment, and we want to install the CrashPlan service on our Synology. We'll need Java for that.

A Synology is effectively a headless custom Linux computer. Some have an Intel chip and some have an ARM chip. You should find out which CPU/chip your Synology has from this table, and remember it. We need to get the right version of Java for our CPU.

If you have an Intel CPU, you'll get Java 6. If you have an ARM CPU you can get Java 7. You download Oracle Java Embedded from the Oracle Website yourself. Note that you'll have to Register for an Account and Sign in. You'll also need to click "Accept License Agreement" to download it. There's a LOT of choices and it's confusing.

If you get it wrong, don't worry. Later, when you try to install the CrashPlan package you'll get a warning if Java isn't there and that warning will give you the right file name. For Intel, I needed "x86 Linux Small Footprint – Headless."

Download this file and copy it to \\yourserver\public.

4. Add http://packages.pcloadletter.co.uk as a new repository in the Synology Package Manager

Back on your Synology, from the web browser, go to the Package Center, then Settings, then Package Sources. Add http://packages.pcloadletter.co.uk as a new repository. I named it "PC Load Letter" but it doesn't matter.

Adding a custom package source

5. Install the CrashPlan package on your Synology. Stop it and restart it.

Staying in the Package Manager, go to Other Sources.

You'll need the Java Package and the CrashPlan package.

You need to install the Java Package first and it will pull from binaries from the \\yourserver\public  folder. It doesn't need to be "started" as it's really a software package disguised as a service. It's OK that its Status is Stopped.

Java Packages

Next, install the CrashPlan service if you have a basic CrashPlan+ account like I do. There are other packages for Pro and Business.

After the service installs and runs you can click More then Log and see if it started correctly. You'll need to stop and restart manually it at least once when you've FIRST installed it.

The CrashPlan Service is starting

Now, you've got a headless service waiting and running on your Synology. But you'll notice there is no UI, no settings and no way to configure it. That's where the CrashPlan client comes in that you'll run on any regular computer you have.

6. Install the CrashPlan client on one of your main computers.

Go download and install the right CrashPlan client for you. After you've installed it, you'll need to POINT the client to your Synology.

You need to edit the "C:\Program Files\CrashPlan\conf\ui.properties" text file and put in the IP address of your Synology. My Synology is called "SERVER" so I opened a command prompt and typed "ping server" and was told its address is 192.168.1.18.

    • NOTE: This is a Linefeeds only Linux text file so you'll want to use Notepad2 or something OTHER than Notepad so you don't corrupt this file. Make a copy.

Remove the # in front of serviceHost to 'uncomment' that line and add your Synology IP address at the end.

Pointing ServiceHost to the right place

  • OPTIONAL NOTE: You can turn off the CrashPlan Service on the computer that has the CrashPlan client running if you won't be backing up that machine. Run "services.msc" and change the CrashPlan service to "Manual."

7. How do you know it is working?

Run CrashPlan on your main computer to ensure it's successfully talking to your Synology.

  • You should see your Synology's name on the Settings Dialog
  • You should see CrashPlan Central in your Destinations if you have a CrashPlan subscription
  • You can select your files that exist on the Synology from the CrashPlan application on your main computer. Remember this CrashPlan client talks to the headless service running on your Synology.

The initial backup will likely take a LONG time so be patient - like for days or weeks. I am choosing not to backup super-large files like DVD backups, 60 gig VMs and other things. My #1 concern is family photos and personal files, so my initial backup set is only 200gigs.

Seeding my CrashPlan account

You can get CrashPlan+ and do one computer, or get CrashPlan+ Family and do up to 10 computers.


* These are affiliate links to CrashPlan. The link is NOT mine and I'm not personally affiliated with CrashPlan. Instead, clicking them and signing up for CrashPlan will support the nice gentleman at PCLoadLetter.co.uk who put in the hard work of making and maintaining CrashPlan packages and hosting them. By signing up for CrashPlan using his link you help him out a little, as we should, given his fine efforts. Big thanks for PCLoadLetter and the Synology community for all their efforts! I hope my tutorial makes it even easier for folks to get their CrashPlan back-ups setup so cleanly!

About Scott

Scott Hanselman is a former professor, former Chief Architect in finance, now speaker, consultant, father, diabetic, and Microsoft employee. He is a failed stand-up comic, a cornrower, and a book author.

facebook bluesky subscribe
About   Newsletter
Hosting By
Hosted on Linux using .NET in an Azure App Service

The Computer Backup Rule of Three

November 14, 2012 Comment on this post [66] Posted in Musings
Sponsored By

Hard drive failure. Seriously. - Used under CC. Photo by Jon RossI'm ALWAYS pounding people to backup. I will continue. BACKUP YOUR STUFF. If you care about it, back it up.

Let's talk. Yes, I'm talking to you, non-technical friend. You're a writer, a blogger, not a techie. I get that. Can't be bothered, I get that. Very busy. You will be even busier when you lose access to your dropbox, or leave your laptop on a train.

Please. Read. Tell your friends.

These are NOT backups

Here are some things that are NOT backups. Feel free to tweet or Facebook them to shame educate your family.

  • Backing up your laptop to an SD Card in the same laptop is #notabackup
  • Backing up to a hard drive that is 6 inches away from your computer is #notabackup
  • Backing up your Gmail to another Gmail account is #notabackup
  • Backing up your book by copying it to another folder is #notabackup
  • The photos that are still in your camera memory are #notabackup

Do you have any other good examples?

The Backup Rule of Three

Here's the rule of three. It's a long time computer-person rule of thumb that you can apply to your life now. It's also called the Backup 3-2-1 rule.

  • 3 copies of anything you care about - Two isn't enough if it's important.
  • 2 different formats - Example: Dropbox+DVDs or Hard Drive+Memory Stick or CD+Crash Plan, or more
  • 1 off-site backup - If the house burns down, how will you get your memories back?

Why so paranoid?

Simple. Because I care about my work, photos and data and I would be sad if I lost it.

Think about all the times you've heard about a friend who has lost everything. A decade of photos. Years of email. It hurts-  just like exercise - because it's good for you.

Try restoring from a backup to practice. Backups always succeed. It's restores that fail.

What should I do?

I think at a minimum folks should do this.

  • Have TWO physical backups (hard drive, memory card) with a copy of everything, at least weekly. You can automate this.
  • Backup everything that has data that matters. That means phones, too.
  • Have a cloud backup storage (CrashPlan, DropBox, SkyDrive, something)
  • Don't trust the cloud. I backup my gmail, too.
  • Rotate the physical backups between your house and somewhere else. I use the safety deposit box. You can use your Mama's house. Just label one "Backup A" and one "Backup B" and when you visit, swap them.

Recommended Reading

Here's some other blog posts on the topic of backup. Now, take action.

About Scott

Scott Hanselman is a former professor, former Chief Architect in finance, now speaker, consultant, father, diabetic, and Microsoft employee. He is a failed stand-up comic, a cornrower, and a book author.

facebook bluesky subscribe
About   Newsletter
Hosting By
Hosted on Linux using .NET in an Azure App Service

The Internet is not a black box. Look inside.

November 12, 2012 Comment on this post [31] Posted in Back to Basics | Musings
Sponsored By

All too often I see programmers trying to solve their problems on the internet by blindly "flipping switches."

Change something, hit refresh in the browser. "Why is that cached? What's going on?" Change something else, hit refresh in the browser. "What's the deal?"

You may have heard the term "cargo cult programming" where islanders after World War II would wave sticks hoping that planes full of supplies would fly over. They drew a conclusion that the sticks waving caused the planes to come.

Think about abstractions. This is a good reminder for the beginner and the long-time expert. This applies not just to computers but to cars, light bulbs, refrigerators and more.

What are you not seeing? Look underneath.

When coding on the web, remember that effectively NOTHING is hidden from you.

A friend emailed with a question about some CSS files not caching. This is a smart guy with a long question about a confusing behavior in the browser. I asked - as I often ask - what's happening underneath? Did you look inside?

Are you using Fiddler? Did you press F12 in your browser of choice and explore their network tools? Are you using WireShark?

Literally this moment, as I am writing this post, I just noticed that the Twitter box on my blog here doesn't have my latest tweet embedded.

Where's my tweet?

I could hit refresh a bunch of times, google around for vague terms, email a friend, or I could look inside.

I hit F12 in my browser. I look at the Network tab, and sort by Status.

Remember to use the Network Tools in your browser

Hey, suddenly my Twitter API call is a 404. First, that's lame of them. They should have redirected me, but alas, no one respects the permalink anymore. #getoffmylawn

With this single  insight I am now armed with googleable terms. I do a single search for "twitter user timeline json api" and see at the Twitter Developer Center that they've changed the format to included "api." and a version number.

I change my template to call this changed URL https://api.twitter.com/1/statuses/user_timeline/shanselman.json?callback=twitterCallback2&count=10 instead, and hit Refresh in my browser, once.

There's my tweet?

There's my tweet. No joke, this just happened. Good timing, I think.

You decide how deep you want to go down the rabbit hole. I am not expecting everyone to be a neurosurgeon or a professional network engineer but I firmly believe that digging just one layer deeper in all things will enhance your life and your work.

Learn basic HTTP debugging and ALWAYS check your result codes. Even if you are a non-technical blogger, learn how to check for 404s and 301s and 500s and assert your assumptions.

The world - and the internet - is not a black box. Look inside.

About Scott

Scott Hanselman is a former professor, former Chief Architect in finance, now speaker, consultant, father, diabetic, and Microsoft employee. He is a failed stand-up comic, a cornrower, and a book author.

facebook bluesky subscribe
About   Newsletter
Hosting By
Hosted on Linux using .NET in an Azure App Service

Disclaimer: The opinions expressed herein are my own personal opinions and do not represent my employer's view in any way.