How To: Use Google Earth or Virtual Earth to Visualize a New House Lot - Part 1
Required Tools
(assumes Windows, but there's comparable tools on any platform)
- Google Earth
- Paint.NET (or any editor that does the PNG format with transparency)
- WinSnap or WindowClippings (or ALT-Printscreen) to do screenshots
- Possibly Acrobat Reader
- Optionally: Google SketchUp (for Part 2)
We were screwing around last weekend looking a houses and found a big empty lot that some folks are building houses on. I was surprised that the Real Estate folks (at least these) weren't very computer savvy. Everything's pushed around on paper. There's no kiosk, no 3D renderings, nada. I wanted to understand how the neighborhood would lay out and where houses would sit, but other than pencil sketches, they couldn't help me. Seems that this kind of thing could be very useful to a prospective buyer.
So, given my lunch hour...
(This isn't a house or neighborhood I'm looking at, I've just selected it for demonstration)
Most folks have used Google Maps or Virtual Earth before, but mostly just for driving directions. Few "civilians" (read: non-geek) that I've met have used Google Earth, which is a shame.
If you want to visualize your house lot, here's some steps to help make that possible.
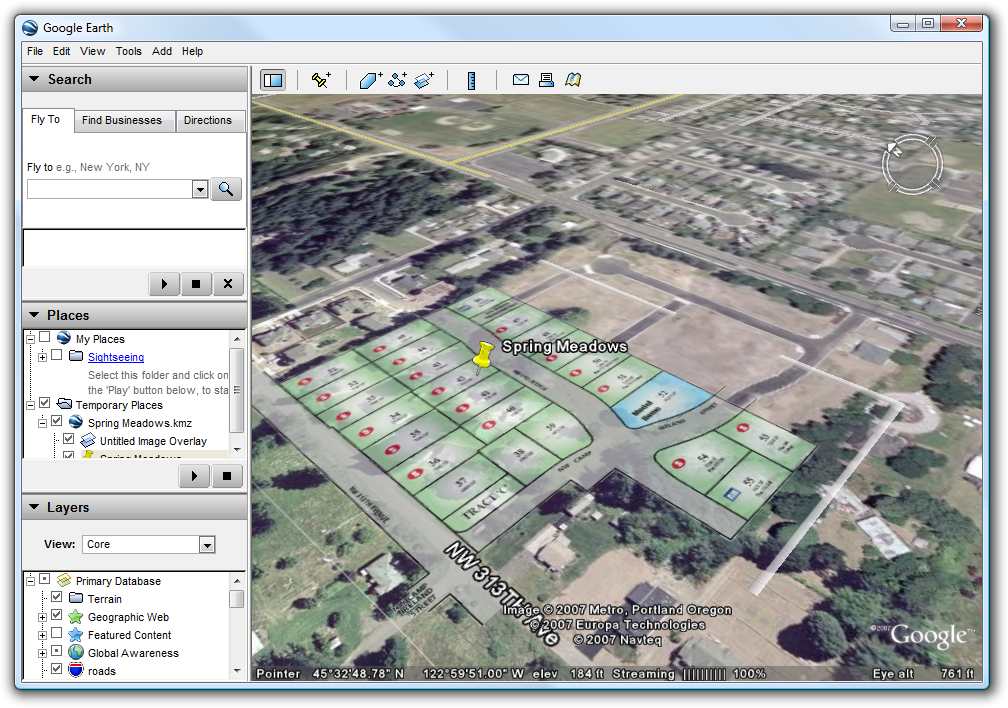
1. Download Google Earth and find the lot.
The imagery is usually a few years old, but if it's an empty lot anyway it shouldn't matter. Put a pushpin on the area so you can get back there quickly.

2. Go to your Builder or Realtor's site and get the neighborhood map.
Often these maps are in PDF format. Open the PDF and get it as large as you can on the screen.
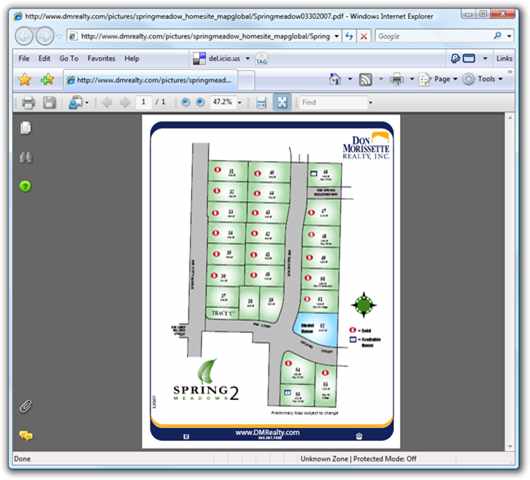
3. Edit the Neighborhood map and remove the non-map stuff, leaving the rest transparent.
Use the screenshot tool or press Printscreen to get a screenshot in the clipboard. Open your Paint application and paste in the picture of the neighborhood.
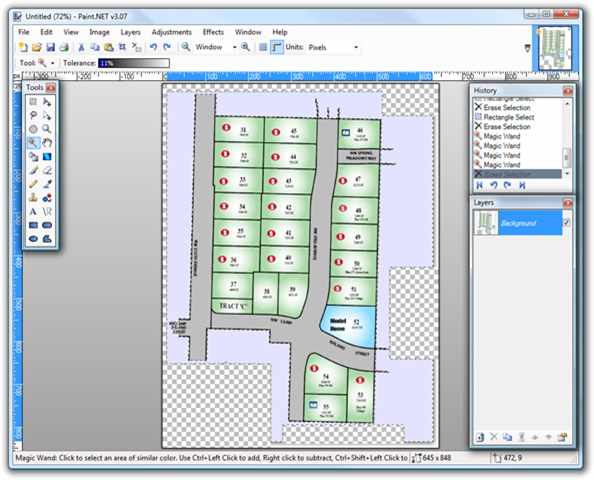
Once you've got your neighborhood picture in Paint.NET (or whatever editor) use the Eraser or Magic Wand tool set to low tolerance to select and delete all the whitespace that isn't part of the map. In this example I'm removing logos, the legend, everything. The checkerboard area underneath means "transparent" or "see-thru." This will make our map look much better once we put it into Google Earth. Now, be sure to save this file as a PNG, which is a file format that includes transparency.
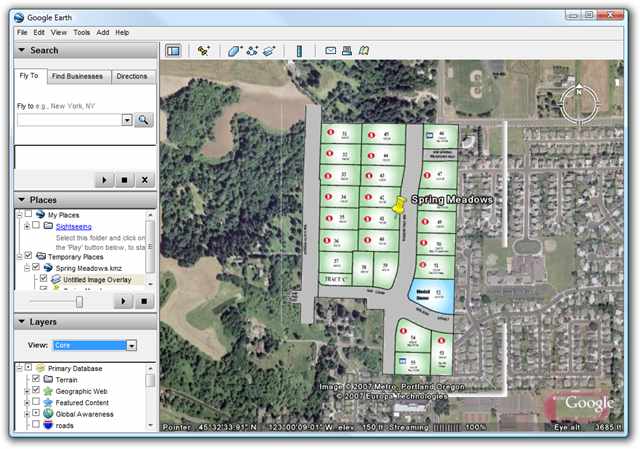
4. Import the new transparent Neighborhood Map and resize
Now, go back over to Google Earth and click Add | Image Overlay and select your just-saved PNG file.
Goof: I realize now after this is all done that I kind of screwed up this example because I left some white border in the far right and very bottom, and a tiny white line on the far left of the neighborhood map. It looks a smidge sloppy. :( Make sure you double check your transparency and get all the non-map stuff removed cleanly.
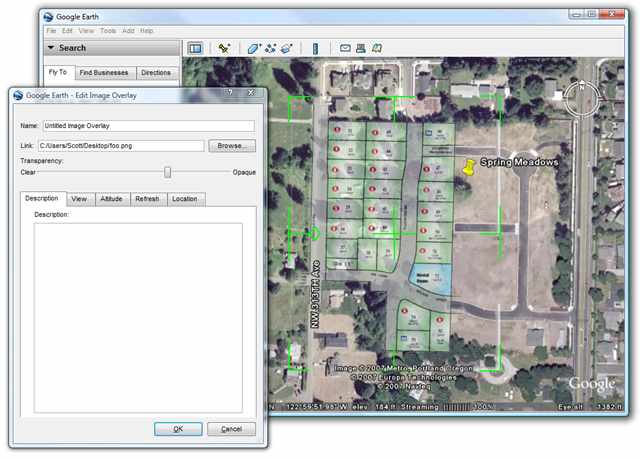
This step can be VERY confusing because Google Earth has no way of knowing what the "scale" of your image is, so it'll just fill the screen. You can't immediately resize the image and it can be very frustrating.
TIP: You have to Right Click the new Image Overlay in the Places pane, usually on the left site of the Google Earth screen. In my screenshot above it's called "Untitled Image Overlay." Right-click it and select Properties. Only when the Properties Dialog is up can you resize the image. You'll know you're able to resize when Kermit-green colored lines appear all around your image. Hover your mouse over these lines to resize your image. I encourage you to make the image partially transparent to make resizing easier.
Try to use existing or soon-to-be-connecting streets to get an idea how your neighborhood and lot will fit into the scheme of things. Remember that you can use the mouse wheel and move the view around WHILE you are resizing your image. Note that the Properties Dialog is "modeless" - that means you can do stuff while it's showing, unlike many other Dialog Boxes.
Be sure to press "OK" on the Properties Dialog or you'll undo all your hard work. Now that your image overlay is positioned it is a part of the Google Earth system (at least on your computer) and you can few the lot from multiple angles and elevations. You can also move your Pushpin - again, only via the Properties Dialog - and point it at your lot.
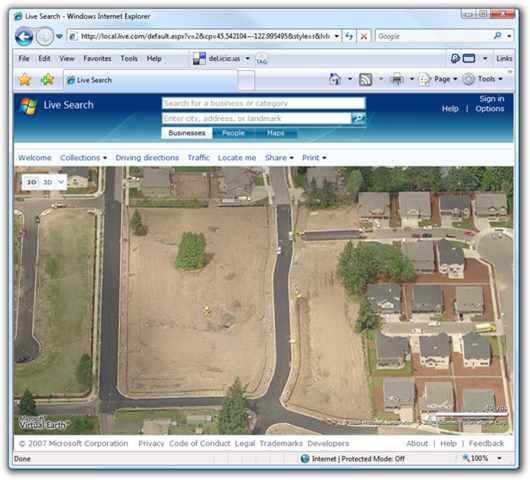
4a. Get better imagery in Microsoft Virtual Earth and a Static Bird's Eye Image
Microsoft Virtual Earth has flyover imagery from airplanes taken at an angle that are MUCH higher resolution than typical satellite photos. The pictures are also sometimes newer than those found at Google. Find your lot/plot in Virtual Earth, and click the Bird's Eye View icon under 2D imagery. Press F11 to put your browser into "Kiosk" Mode in order to get a larger image.
TIP: In Virtual Earth, click Share | View Permalink and notice the latitude and longitude numbers in the URL. You can "hack" that URL (you can edit it) and plug in the exact lat/long numbers from Google Earth to quickly get to the same spot in Virtual Earth.
Take a screenshot and put it in the clipboard. Launch your Paint Program and paste it in as a fresh image.
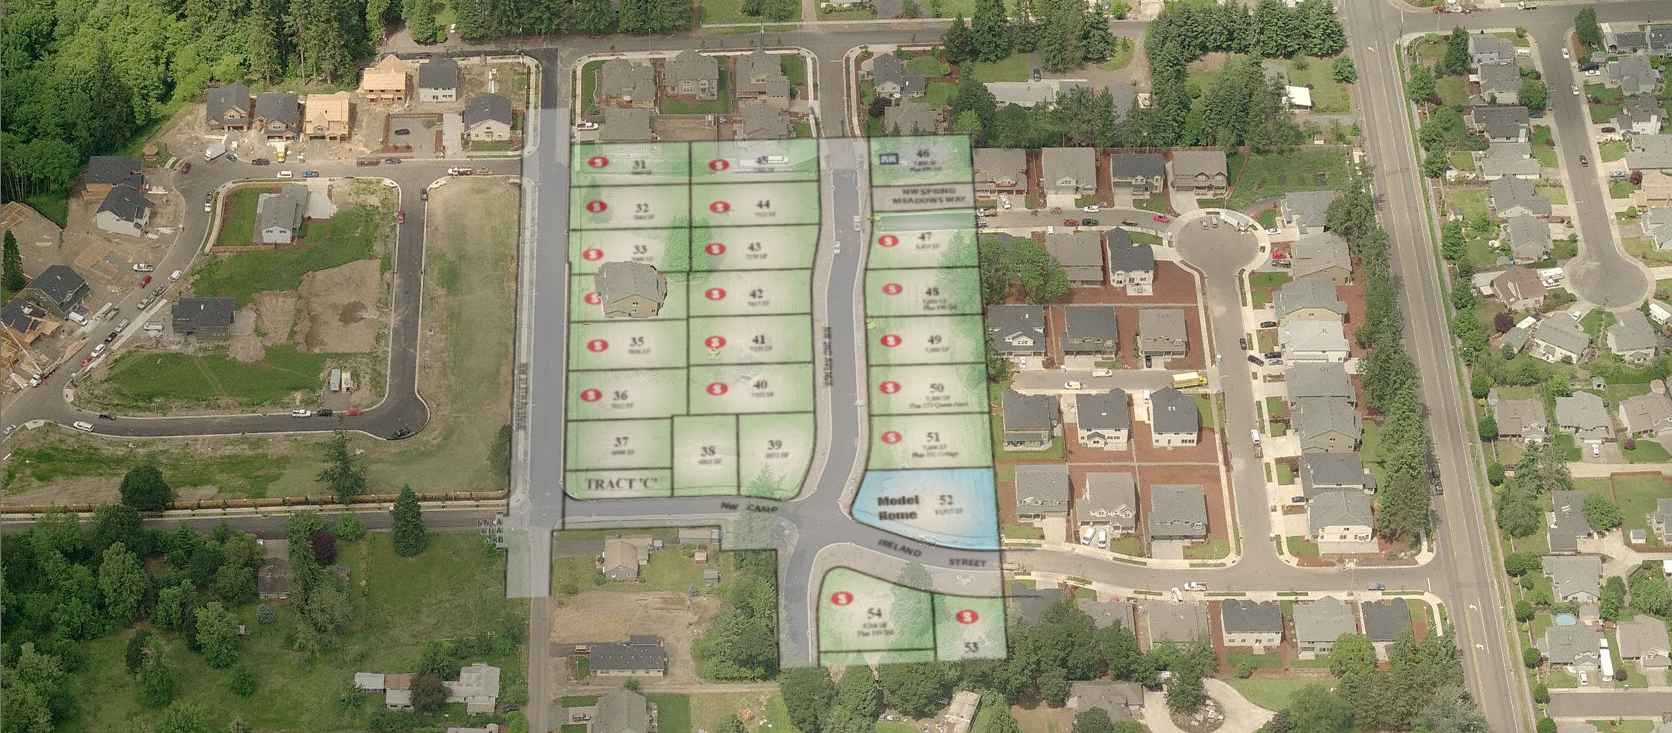
Add a new layer in your Paint program. In Paint.NET, click Layers | Import from File and select your PNG file of the neighborhood layout that you created earlier. Make the layer slightly transparent to help with positioning. In Paint.NET you do this by double-clicking on your new layer in the Layers Floating Toolbox and changing it's opacity.
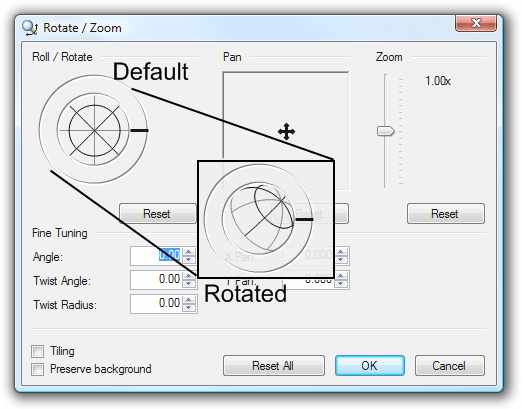
In an application like Photoshop you can use the Free Transform option to skew and warp your neighborhood map to match the angle and aspect of the Bird Eye View imagery. In Paint.NET I didn't think this would be possible, until I figured out the Rotate/Zoom tool. The tick is that you can actually click and drag that little ball to change any selection. You can also use the Pan and Zoom to affect your image. These are the tools you need to get your neighborhood map to fit. A second after you make a change - without closing the Dialog - the picture will update. By making small incremental changes you can line up the map to the photo. If you have trouble with things moving too fast, select the control you want to change and use the Arrow Keys to move things 1 number at a time.
You might even use the Lasso tool to grab a house in the neighborhood that looks just like your future home and place it on the lot as I've done in the sample below.
In a Part 2 post I'll show you how to start drawing your house (to the best of primitive ability) in 3D using the home plans and placing it into the Google Earth environment.
About Scott
Scott Hanselman is a former professor, former Chief Architect in finance, now speaker, consultant, father, diabetic, and Microsoft employee. He is a failed stand-up comic, a cornrower, and a book author.
About Newsletter


Sounds a lot like some of the software projects I've been on. You should feel right at home with the process, Scott.

It has now gone to a trial-ware mode, but the last "free" version can still be downloaded from some locations.
The following blog article has a URL where you can get version 5.3 from if you want.
"*Sigh* FastStone Capture Turns to Shareware…now $30" - CyberNet News
I really love it.
Just my humble 2-cents.
Hmm. Maybe I should put up or shut up. I just snarfed the map from the screenshot above (so the resolution is horrible -- please, try it with the original PDF!) and snapped it down to Virtual Earth with two MapCruncher pushpins, and rendered it to S3. Check it out here:
MapCruncher Output
Be sure to try 3D mode and tilt the plane down to see just how easy it is...
--Jon

NE Portland is calling you home brother! Come back to your roots. Great food, walk everywhere and take the train to work. Jack

Comments are closed.
Real good example of "outside the box" thinking!
Something tells me this is going to be a popular post.
The how-to steps are clear and detailed, but quite approachable and (seems to me) non-technical.
Great post! Thanks for sharing!