Scott Hanselman

Building your own Arcade Cabinet for Geeks - Part 5 - Paint and Art

June 06, 2009 Comment on this post [1] Posted in Arcade
Sponsored By

This is the fifth part of a multi-part series I'm going to do about assembling an Arcade Cabinet for my house. This series has two disclaimers:

Software Disclaimer 1: There's all sorts of legal issues around emulating arcade games. This series of posts has nothing to do with that. I do own some original arcade boards, but if you want to emulate arcade games with MAME (Multiple Arcade Machine Emulator), you can search the 'tubes. What I'm doing here is putting a computer in a pretty box.

Hardware Disclaimer 2: Many folks that build arcade cabinets have a purist view of how these things should be done. They will prefer original Arcade CRT monitors and more expensive, higher quality parts. I am more of a pragmatist. I also have no idea what I'm doing, so I've also got ignorance on my side.

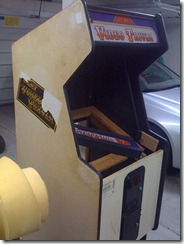
Paint is pretty easy. Two coats people say. I am a believer. ALWAYS two coats. For this project I also did a few other things. John suggested that we use the orbital sander to really give the wood a little texture so the paint would grip. The sander also took off the side art nicely.

Paint

I sanded the heck out of it. I used some wood putty to fill in some holes and nasty parts, let them dry, then sanded over them. Then I used a small foam roller (brushes are too slow, and I really don't like the texture they often leave) to do a first coat with a "Killz" tinted primer. This stuff is amazing. It really covered stains and stickers and all sorts of crap.

IMG_0036 IMG_0332

Then I taped off all the important bits with blue painters tape. The Killz Tinted Primer is nice because I only needed an hour or so (I waited 2) to put the first coat of paint.

Cost: US$35
Cost So Far: US$341

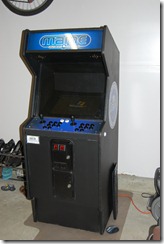
I waited overnight for the second coat of black and let me tell you, it really took the paint to the next level. It looks cleaner, smoother, sharper, and the coverage is perfect. Really, people. Two coats. It's like flossing. If you don't floss, don't even bother brushing. Two coats, or don't bother. I'm a believer.

Art and Marquees

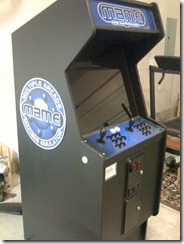
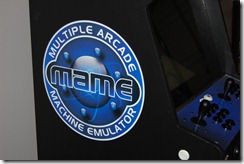
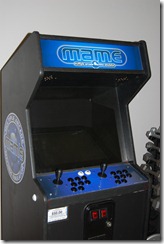
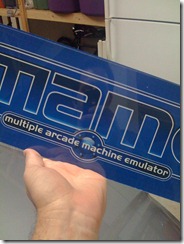
I went over to Mame Marquees to get the side art. I've heard nothing but nice things about their work. They often have sales and overstock, and while I was originally planning on custom "Hanselcade" art, I fell line love with this classic "atomic blue" design.

DSC_0139DSC_0141

Cost: US$100
Cost So Far: US$441

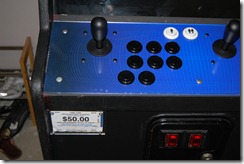
The side art came with a sticky back and was surprisingly easy to install without any bubbles. You just start at the top, remove an inch of the back, and slowly remove the back pulling down as you smooth from the top. I would say it was skill, but the decals are very think vinyl and of high quality. I don't know what kind of printer he has but it's worth the money. The art really gave the project "pop!" IMHO.

DSC_0135   DSC_0136

As I mention in the Control Panel section, the vinyl for the control panel was sandwiched between the steel and the acrylic. No adhesive was used as the 19 buttons and the pressure of the outer screws hold it all in place.

IMG_0172IMG_0179

Now, I get to put the computer inside and hook it all up!

Next Up: Computer Hardware and Software

  1. Cabinet and Power
  2. Monitor and Mounting
  3. Control Panel
  4. Sound and Lights
  5. Paint and Art
  6. Computer Hardware and Software
  7. Success and Conclusion

About Scott

Scott Hanselman is a former professor, former Chief Architect in finance, now speaker, consultant, father, diabetic, and Microsoft employee. He is a failed stand-up comic, a cornrower, and a book author.

facebook bluesky subscribe
About   Newsletter
Hosting By
Hosted on Linux using .NET in an Azure App Service

Building your own Arcade Cabinet for Geeks - Part 4 - Sound and Lights

June 06, 2009 Comment on this post [0] Posted in Arcade
Sponsored By

This is the fourth part of a multi-part series I'm going to do about assembling an Arcade Cabinet for my house. This series has two disclaimers:

Software Disclaimer 1: There's all sorts of legal issues around emulating arcade games. This series of posts has nothing to do with that. I do own some original arcade boards, but if you want to emulate arcade games with MAME (Multiple Arcade Machine Emulator), you can search the 'tubes. What I'm doing here is putting a computer in a pretty box.

Hardware Disclaimer 2: Many folks that build arcade cabinets have a purist view of how these things should be done. They will prefer original Arcade CRT monitors and more expensive, higher quality parts. I am more of a pragmatist. I also have no idea what I'm doing, so I've also got ignorance on my side.

The sounds and lights part was the easiest part of the whole thing so far. After the challenging control panel, this was a nice change of pace.

Sounds

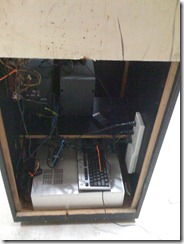
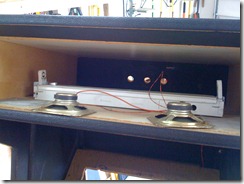
This was pretty straight-forward. There's a compartment at the top of the cabinet. I took some zip-ties and essentially lashed some computer speakers, facing down, to the sides of the inside of this area. There's speaker-shaped drilled holes in the bottom of the top, so the sound can get out. There's a subwoofer in very bottom of the machine, next to the computer.

IMG_0086 IMG_0108

The speakers and sub were just old computer audio stuff I had lying around. I could have reused the tinny speakers that were already in it, but I wanted to punch up the sound a smidge. You can see the subwoofer in the right-hand side picture, sitting on a sturdy shelf, next to the coin collection box.

Cost: US$0 (Had speakers lying around.)
Cost So Far: US$306

Now, lights.

Lights - Marquee

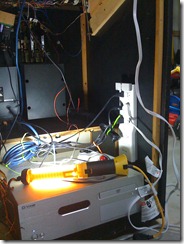
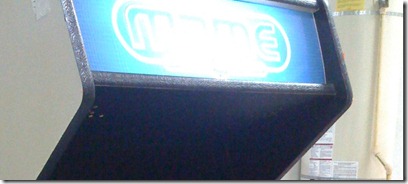
In the top compartment, we put in a small 18" florescent light tube. Then when we ordered the art from Scott at Mame Marquees, we made sure it was translucent and that he'd throw in the Plexiglas for free. I didn't want to cut any more of that again. :)

IMG_0073IMG_0299

Then I threaded the AC cord and plug down the inside-back of the cabinet and plugged it into the smart Power Strip. This was clean, easy and had a big pay off. It looks bright in the picture because of the camera, but wait until the end. It looks niiiice.

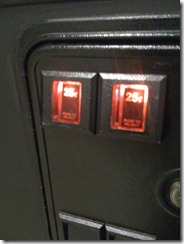
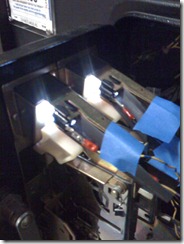
Lights - Coin Door

In every write-up of every Arcade Cabinet I've ever read, folks have fun doing the coin door lights. You can't have one of these without doing it. It's just required. It also requires some thought, which I forgot.

I started by going to Radio Shack and buying two random, but bright-looking LEDS. Then I tool an old USB cable, which I knew was 5 volts and I hooked it up directly to the LED. It was bright for about 5 minutes then died. Then I remembered I was an idiot. I was so excited I just went nuts and forgot about resistors.

I went to an LED Calculator and put in the source voltage, 5V, the LED voltage, 3.5V and their current, 20mA. There would be two LEDs, so it spit out this recommendation for two 82 ohm resisters in parallel.

image

I got my multi-meter out and found an 85 ohm resister I had lying around. I figured that was close enough. I busted out the soldering iron and got to work.

IMG_0346 IMG_0347 IMG_0348

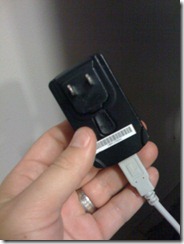
I plugged my old USB cable into an old cell-phone BlackBerry AC adapter that put 5V and .5A through the USB cable and there was light!

Cost: US$5 (Resisters, Solder, Random Radio Shackiness.)
Cost So Far: US$311

Ok, time to paint.

Next Up: Paint and Art

  1. Cabinet and Power
  2. Monitor and Mounting
  3. Control Panel
  4. Sound and Lights
  5. Paint and Art
  6. Computer Hardware and Software
  7. Success and Conclusion

About Scott

Scott Hanselman is a former professor, former Chief Architect in finance, now speaker, consultant, father, diabetic, and Microsoft employee. He is a failed stand-up comic, a cornrower, and a book author.

facebook bluesky subscribe
About   Newsletter
Hosting By
Hosted on Linux using .NET in an Azure App Service

Building your own Arcade Cabinet for Geeks - Part 3 - Control Panel

June 06, 2009 Comment on this post [4] Posted in Arcade
Sponsored By

This is the third part of a multi-part series I'm going to do about assembling an Arcade Cabinet for my house. This series has two disclaimers:

Software Disclaimer 1: There's all sorts of legal issues around emulating arcade games. This series of posts has nothing to do with that. I do own some original arcade boards, but if you want to emulate arcade games with MAME (Multiple Arcade Machine Emulator), you can search the 'tubes. What I'm doing here is putting a computer in a pretty box.

Hardware Disclaimer 2: Many folks that build arcade cabinets have a purist view of how these things should be done. They will prefer original Arcade CRT monitors and more expensive, higher quality parts. I am more of a pragmatist. I also have no idea what I'm doing, so I've also got ignorance on my side.

This part, the Control Panel, truly kicked our collective butts. We were rockin', working occasional evenings and making progress until we got here. This took probably 3 weeks (a day here and there, wait, a day here and there) and was a huge hassle. In retrospect, we know what we could do to make it easier on ourselves, but you live and learn.

Custom or Stock

Arcade Purists will say you should design your control panel custom, to suit your needs. You can visit a site like Happs Controls and buy the buttons and sticks and trackballs and what not, all to your specs. You can then buy a PCB Board that will let you map your buttons to keyboard strokes. Ultimarc has one called the I-PAC that seems to be the standard. If you like wiring and customization, this could be a good choice for you.

Buttons and Sticks the Easy Way

However, on this project I was really trying to find a balance, and stay cheap and pragmatic but with an eye on quality. So I decided to do a combination. I bought the Tankstick from X-Arcade with the plan to take it apart and install it into the original control panel that came with my arcade cabinet shell.

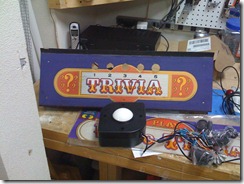
image IMG_0100

You can see from the picture on the right that I attempted to make a trackball fit, but ended up sending it back. It just was too large.

Instead, I took part the X-Arcade stick and used its wood top as a template for my stock steel control panel. I took a piece of Plexiglas and made a template out of it. Unfortunately this kind of acrylic is very hard to drill and I cracked two before I gave up. More on the plastic later.
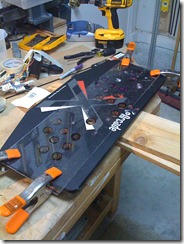
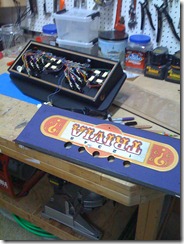
 IMG_0116 IMG_0110

Cutting and Cutting and Cutting

Then, John and I transferred our button layout to the original steel panel with a Sharpie Pen. We got a bit-metal "hole saw," is is apparently what you call a big drill bit. It's a 29mm hole, which is standard for arcade controls. We had 19 to drill.
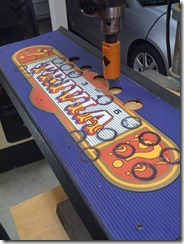
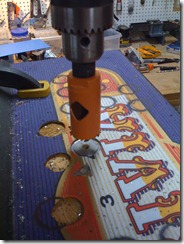
IMG_0125 IMG_0126

The drill bit lasted exactly 1 and 1/2 holes before it burned up. After the fact we learned that there are specific RPMs (speeds) that you should drill steel and we were drilling WAY to fast. I bought another drill bit and we got through a few more, but the drill press we were using wasn't strong enough to hold on to the bit. I wouldn't want to try this with a hand-held drill.

At this point, I had a choice. Spend more money on a drill and/or more bits, or enlist the help of a professional. I went to a local "machine shop" and told them to do their best.

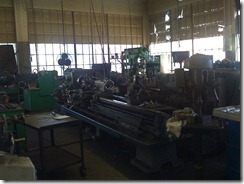
IMG_0151IMG_0154 

They thought what I was doing was pretty funny, but they sure nailed it. The result was laughed at on Twitter, but it looked great to us.
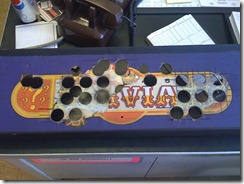
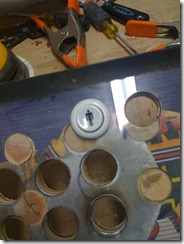
IMG_0152 IMG_0178

It looks funny, like there's too many holes because there are too many! There were a few holes underneath the vinyl. Apparently the Video Trivia game had been ANOTHER game before! However, none of the holes were positioned in any way that would compromise the structure of the steel. Notice the Player 1 button in a new hold intersecting with an old hole. No problems.

Cost: US$100 (hired a pro)
Cost So Far: US$231

Now, we need to make a sandwich. First steel, then new vinyl art, then an acrylic/Plexiglas layer.

The Sandwich

We thought we'd need a piece of wood to stabilize the whole panel and give the buttons something to hold on to, but we underestimated how strong the steel was. Even though we added piece of wood underneath, we ended up abandoning it as a waste of time.
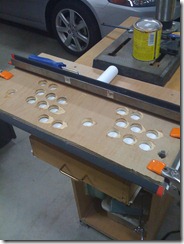
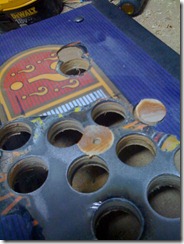
IMG_0180 IMG_0177

However, drilling all those holes in the wood wasn't a waste. We used the filler pieces of holes to fill up the holes that we didn't need. We put them in the holes and used an orbit sander. This provided a smoother surface for the vinyl to lie on.

Back to the Plexiglas. I tried to drill a bunch and just couldn't get it right. We'd do a bunch of holes and it would crack. After the fact, we learned there are specially designed drill bits for drilling holes in this kind of acrylic. Again, hindsight is 20/20, but live and learn.

Again, to a pro. I called a local plastics shop and they said if I gave them a Corel Draw file that was accurate to a 1/2 mm that they could cut it with freakin' lasers.
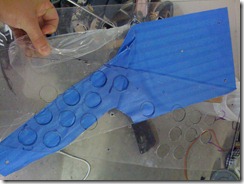
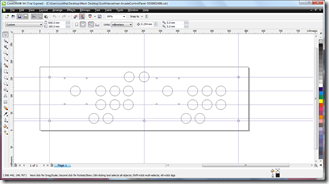
IMG_0333 corel

Awesome. Since I love lasers, all the better. I downloaded the Corel Draw 30-day trial and got to work with a small ruler. I measured the heck out of my stuff, praying I wouldn't be off by a millimeter and have things not line up. Here's the EPS and Corel Draw files if you want them.

Cost: US$75 (hired a pro)
Cost So Far: US$306

Turns out I nailed it. I was off by less than a half millimeter in a few spots, but nothing that we couldn't work around with a small hobby razor blade.

I'll talk about Art in Part 5, but I have to mention it here as it's part of the sandwich. We ordered art from Scott at Mame Marquees and were thrilled with the results.
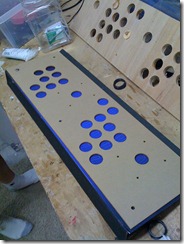
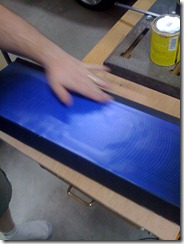
IMG_0290 IMG_0179

With the vinyl applied to the cut steel, I used the hobby knife to cut the holes for joysticks and buttons.

Wiring, Joysticks and Buttons

Next, John and I took the X-Gaming Arcade Stick apart on his counter. We labeled each button so we could put it back together in the SAME way inside our control panel. We also took a LOT of high-res photos as a reference.
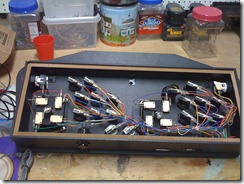
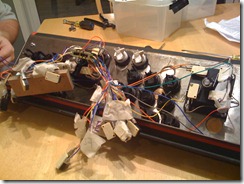
IMG_0101 IMG_0294

The picture on the left is the inside of the X-Gaming stick as we purchased it. The right side is the buttons, controller board and joysticks. Note there are a few buttons that don't go in the control panel like the side flippers, programming switch and learn button.

Here's the complete control panel sitting on John's kitchen counter.
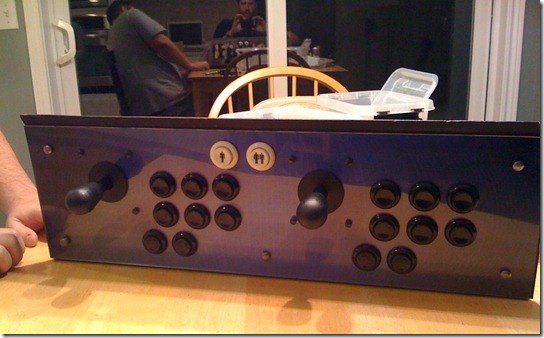
IMG_0293

Cost: US$0 (John is nice to me, and free.)
Cost So Far: US$306

At this point we have the exact guts of an X-gaming Arcade Stick inside our stock control panel. The controller for the thing includes a PS/2 port, so as long as my computer has a PS/2 port (or I get an X-Gaming USB or Xbox adapter, etc) then it'll just look like a keyboard to the system.

Next Up: Sound and Lights

  1. Cabinet and Power
  2. Monitor and Mounting
  3. Control Panel
  4. Sound and Lights
  5. Paint and Art
  6. Computer Hardware and Software
  7. Success and Conclusion

About Scott

Scott Hanselman is a former professor, former Chief Architect in finance, now speaker, consultant, father, diabetic, and Microsoft employee. He is a failed stand-up comic, a cornrower, and a book author.

facebook bluesky subscribe
About   Newsletter
Hosting By
Hosted on Linux using .NET in an Azure App Service

MSDN Updates - and RFC for you

June 06, 2009 Comment on this post [61] Posted in Microsoft | MSDN
Sponsored By

There's a bunch of stuff going on over at MSDN. They're making some cool changes and aren't afraid to break a few eggs to make an omelet. I used to think that MSDN was this static, non-moving thing, but I've been meeting with a bunch of folks on the various sub-teams and I'm seeing a resurgence of agility. (MSDN, agile?! Madness! No, seriously.) Soma blogged recently about some of the changes.

Here's some of the stuff that's been going on lately at MSDN, as well as a Request for Comments (RFC) from me.

Alternate MSDN Views

I blogged while back about alternate views for MSDN, including a Low-Bandwith (loband) view. MSDN includes the Home Page (of course), the MSDN Library, Downloads, Community and Forums. The library experience (LEX) team has updated the loband view as well as the new  dev10ide view. They're aiming for sub-1-second load times, small page weight and they are reading all the feedback

MSDN Forums in ASP.NET MVC

image The MSDN Forums have been updated and are now written in ASP.NET MVC. This, along with other changes has made the forums markup much smaller and the site much snappier. This forum upgrade went out to all MSDN/TechNet forums, including the Windows 7 Forums and Windows Client Development Forums.

The Forums are also more answer-focused now, kind of like StackOverflow. You can see how many questions remain unanswered, mark questions answered, and browse by tag. There's also filters like "hascode" to show only Q&A with code, or you can show only "helpful" answers, or just proposed, but not accepted answers.

The Forum Reading view has been updated with AJAXy goodness, so you can expand threads without leaving the page.

Other tweaks to MSDN include, the MSDN Community Center that includes not just blogs, but also tweets, delicious links, Technorati results and Diggs.

What would a new MSDN look like?

Chris Sells told me once:

"If you're not getting in trouble at least twice a year, you're not doing your job."

This statement really changed the way I thought about my job. It's good to push the envelope.

I was in an MSDN redesign meeting and they were brainstorming on some potential designs. I said, hey, let's go crazy here and try some way-out-there-MSDN designs. A bunch of emails have been thrown around and since they never explicitly said "don't blog this," I figured, why not ask you guys, then take the feedback/comments you give directly to them.

This is just brainstorming, to be sure, VERY early on for a potential redesign. I picked a few comps that the designer was working on that were in the same vein, but different in purpose.

First, here's a concept design for a a would-be MSDN Home Page. There's two goals here, and a visual refresh is just one of them. The other is to change the user experience to make it easier to find things. To make it easy to find things you need, but also have enough active content to have "serendipity" moments when you see something you wouldn't ordinarily.

There's a community visualizer at the middle there. It'd be an active widget and clicking on the left site would get you real-time results with recent activity, most popular items, etc from all over the network.

The Developer Centers are called out on the left-side to get you to the top areas in one-click. I pushed them to get you from the MSDN Home page to mostly anywhere in one click, two tops. For example, downloads has the most likely download links. At the bottom, you can get to other sites within the network.

MSDN_LOCH_HOME

Perhaps a lighter frame?

lightframe

Darker? Notice the "channel bar" at the top in gray.

MSDN_SHOE_HOME_D

Perhaps a compromise?

MSDN_TRAM_HOME


This potential home page is as a result of me saying, do the opposite of what we'd ordinarily do. Is the MSDN Home page too visually busy? Make it simpler. How simple can it get, and if it gets simple, does it still provide value?

MSDN_NORD_HOME

Perhaps without the blue frame? Even simpler?

MSDN_HM_NORD_5

Please offer your opinions and comments here. MSDN is your site and if you have an opinion, make it heard and I'll pass them out to my bosses. How should the site look? How do you want to use it? What do you think of these designs? What works and what doesn't?

If me leaking designs like this is helpful, tell me here and I'll use them as character references at my Court Martial. All the better if you find it helpful, then I'll have good reason to share even more, even earlier in the process.

About Scott

Scott Hanselman is a former professor, former Chief Architect in finance, now speaker, consultant, father, diabetic, and Microsoft employee. He is a failed stand-up comic, a cornrower, and a book author.

facebook bluesky subscribe
About   Newsletter
Hosting By
Hosted on Linux using .NET in an Azure App Service

Building your own Arcade Cabinet for Geeks - Part 2 - The Monitor

June 06, 2009 Comment on this post [6] Posted in Arcade
Sponsored By

This is the second part of a multi-part series I'm going to do about assembling an Arcade Cabinet for my house. This series has two disclaimers:

Software Disclaimer 1: There's all sorts of legal issues around emulating arcade games. This series of posts has nothing to do with that. I do own some original arcade boards, but if you want to emulate arcade games with MAME (Multiple Arcade Machine Emulator), you can search the 'tubes. What I'm doing here is putting a computer in a pretty box.

Hardware Disclaimer 2: Many folks that build arcade cabinets have a purist view of how these things should be done. They will prefer original Arcade CRT monitors and more expensive, higher quality parts. I am more of a pragmatist. I also have no idea what I'm doing, so I've also got ignorance on my side.

Picking a Monitor

image If you ask a purist, the ONLY monitor on to get for your home arcade is the Wells Gardener 27" Flat Screen Arcade CRT Monitor. There are others, and there are special video cards that run at the appropriate 15kHz that these monitors like. This particular monitor I've linked to has VGA support, however and will do 70Hz and 800x600. However, it's also about 80-95lbs.

Not only are these heavy, but they are a hassle to mount, they are heavy (did I mention that?) and depending on which one you get, they can be a little dangerous if you touch the wrong stuff.

True, you will get the "genuine" arcade look. Also, you can't argue with 27", size matters.

IMG_0070For me, however, I used a Dell 2003FP LCD Monitor. You may laugh, but it's clear, high-res, it's fantastically light, and I'm sure at some point, there will be some software to make my LCD as crappy and blurry and ghosty as a real arcade monitor.

Remember, I don't just want to play Donkey Kong, I also want to play Far Cry and Doom, so I am totally happy with a high-res LCD. The only trouble is finding a 4:3 LCD. I happened to have an extra, but you may need to look in the classifieds or on Craigslist.

Another option is to use a 24" 16:9 LCD and cover it with a bezel, or frame. You'll likely already need a bezel around your screen, so cropping the sides isn't a big deal for me. If my 4:3 LCD dies one day, I'll replace it with a 16:9 and crop it and I suspect no one will notice.

Cost: US$0 (I had one)
Cost So Far: US$131

Mounting

While my arcade cabinet came with a large broken (well, I broke it) monitor with burn-in, I needed to change the layout to make my LCD work. You can see there's a hole for dropping a CRT in and having the end of the CRT hang down into the middle of the box.

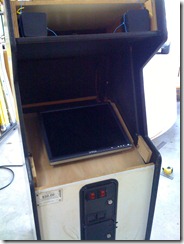
One of the benefits of using an LCD is the standard VESA mount on the back of the monitor. John and I pulled this old wood frame out, and took a piece of plywood and mounted the VESA bracket from the monitor's original pedestal (that we took apart), then put the whole thing back in. Now I can mount any VESA LCD in the system on this centered mount.

IMG_0072IMG_0087 IMG_0083

We then cut a semi-circle at the bottom to make room for both the video cables and the future control panel wires.

Notice also the angle of the monitor. Most older arcade cabinets didn't mount the monitor at a vertical angle or even close to vertical. Instead, since your head will be down while playing, they put the monitor nearer the horizontal.

We'll put a black framed bezel around the monitor in the "art" portion of the project.

IMG_0090 IMG_0091 IMG_0092

Then as seen in the third picture, we added a piece of frosted glass. At this point I'm playing solitaire as a test. I purchased an X-Arcade Dual Tankstick a while back (a year or more) and again, just for a test, I set it in the void.

IMG_0093

To be clear, to finish here would be the height of cheesy, so this is just a test. Unfortunately this point is where a lot of home arcade kits stop, but not us. However, confirming you are on the right track is a good motivator to continue.

Next Up: Control Panel

  1. Cabinet and Power
  2. Monitor and Mounting
  3. Control Panel
  4. Sound and Lights
  5. Paint and Art
  6. Computer Hardware and Software
  7. Success and Conclusion

About Scott

Scott Hanselman is a former professor, former Chief Architect in finance, now speaker, consultant, father, diabetic, and Microsoft employee. He is a failed stand-up comic, a cornrower, and a book author.

facebook bluesky subscribe
About   Newsletter
Hosting By
Hosted on Linux using .NET in an Azure App Service

Disclaimer: The opinions expressed herein are my own personal opinions and do not represent my employer's view in any way.