The Weekly Source Code 26 - LINQ to Regular Expressions and Processing in Javascript
I've been getting more and more interested in how folks extend their applications using plugins and things. In my new ongoing quest to read source code to be a better developer, Dear Reader, I present to you twenty-sixth (half a year!) in a infinite number of posts of "The Weekly Source Code."
Sometimes when I read code, I kick myself (mentally) and say "Man, I should have thought of that!" Then I realize I'm not nearly as good a programmer as I think I am, and then I just let the source just wash over my brain.
Here's some source by smart people I've been reading this week that I should have thought of. ;) Coincidentally they are both examples of languages ported or re-imagined in another language.
"Processing" in JavaScript
When I say "Processing" I mean the open-source Java-based visualization language from http://processing.org/. Jeff calls it "more akin to sketching than coding" while I say it's sketching with code! Jeff yearns: "for the day when web pages are regularly illustrated with the kind of beautiful, dynamic visualizations that Ben Fry creates."

Well, John Resig, arguably already considered one of the best JavaScript coders on the planet after he gave us the tour de force that is JQuery, has ported Processing to Javascript and gives us Processing.js.
You can interact with it in two ways. First, as an elegant and tight Javascript API:
var p = Processing(CanvasElement);
p.size(100, 100);
p.background(0);
p.fill(255);
p.ellipse(50, 50, 50, 50);
Or, you can tunnel the actual Processing language like this:
Processing(CanvasElement, "size(100, 100); background(0);" + "fill(255); ellipse(50, 50, 50, 50);");
 This release is specifically targeted to Firefox3, Opera 9.5 and the Webkit Nightlies (Safari) - all unreleased, beta browsers. I'm going to try it under the DLR with Javascript in Silverlight. Heh heh.
Here are his demos. Remember, these don't work in IE7.
There's a load of demos, but here's a powerful one. A working clock in 17 lines of code.
void setup() {
  size(200, 200);
  stroke(255);
  smooth();
}
void draw() {
  background(0);
  fill(80);
  noStroke();
  // Angles for sin() and cos() start at 3 o'clock;
  // subtract HALF_PI to make them start at the top
  ellipse(100, 100, 160, 160);
  float s = map(second(), 0, 60, 0, TWO_PI) - HALF_PI;
  float m = map(minute(), 0, 60, 0, TWO_PI) - HALF_PI;
  float h = map(hour() % 12, 0, 12, 0, TWO_PI) - HALF_PI;
  stroke(255);
  strokeWeight(1);
  line(100, 100, cos(s) * 72 + 100, sin(s) * 72 + 100);
  strokeWeight(2);
  line(100, 100, cos(m) * 60 + 100, sin(m) * 60 + 100);
  strokeWeight(4);
  line(100, 100, cos(h) * 50 + 100, sin(h) * 50 + 100);
}
His code leans heavily on the Canvas which is why IE7 doesn't work. Much of the processing.js file is mapping from one API (the processing API) to Javascript constructs, usually canvas ones. For example, making a point(x,y) is:
  p.point = function point( x, y )
  {
    var oldFill = curContext.fillStyle;
    curContext.fillStyle = curContext.strokeStyle;
    curContext.fillRect( Math.round( x ), Math.round( y ), 1, 1 );
    curContext.fillStyle = oldFill;
  }
Note the rectangle that is 1 by 1. That's funny, but that's the life an API mapper. Remind me someday to tell you, Dear Reader, how I got filled pie charts working on an Original Palm Pilot that not only didn't support Put/GetPixel but didn't have floating point math. That was a hoot.
Anyway, one really good example of this guy's clean cleverness is the triangle function. Remember, this is a processing function and he's not only got to implement it, but also make the building blocks for doing it cleanly.
To start:
  p.triangle = function triangle( x1, y1, x2, y2, x3, y3 )
  {
    p.beginShape();
    p.vertex( x1, y1 );
    p.vertex( x2, y2 );
    p.vertex( x3, y3 );
    p.endShape();
  }
Obvious, right? Well, not really, considering that the 2D Canvas doesn't have any of those three higher-level methods. Begin and EndShape are fairly clean. However, he had to implement a nice Fill, Stroke and ClosePath to do this cleanly.
  p.beginShape = function beginShape( type )
  {
    curShape = type;
    curShapeCount = 0;
  }

  p.endShape = function endShape( close )
  {
    if ( curShapeCount != 0 )
    {
      curContext.lineTo( firstX, firstY );

      if ( doFill )
        curContext.fill();

      if ( doStroke )
        curContext.stroke();

      curContext.closePath();
      curShapeCount = 0;
      pathOpen = false;
    }

    if ( pathOpen )
    {
      curContext.closePath();
    }
  }
It's about four layers deep, each primitive building on the next until he gets a nice clean triangle implementation, but then he can use it for quad() and it the same method handles bezierVertex as well. It would do you well to FireBug your way through his code. It's a wonderful fun way to re-learn Javascript from a gentleman who knows what he's doing.
LINQ to RegEx and Fluent Regular Expressions
I was trying to re-re-re-learn Regular Expressions again this week for a small task. It's funny how Regular Expressions are the first thing to leave my brain even though there are a bunch of Regular Expression Tools out there. Josh Flanagan came up with a Fluent Interface for Regular Expressions like:
Regex socialSecurityNumberCheck = new Regex(@"^\d{3}-?\d{2}-?\d{4}$");
would look like this:
Regex socialSecurityNumberCheck = new Regex(Pattern.With.AtBeginning
        .Digit.Repeat.Exactly(3)
        .Literal("-").Repeat.Optional
        .Digit.Repeat.Exactly(2)
        .Literal("-").Repeat.Optional
        .Digit.Repeat.Exactly(4)
        .AtEnd);
It took me a second to like this. OK, it took me a while. Breathe for a minute, and read it out loud. It kind of makes sense, actually, although there is a reasonable argument against in the comments of Josh's post:
[It] strikes me that a user of this library needs to learn a fairly complex syntax which is almost as far from "plain english" as regex, when they could simply learn how to do regex.
Sure, but it's fun to try new things. If you look a his source, it's really just a really smart string concatenator. I think it would actually be a very interesting way to teach or learn regular expressions, especially if you're a casual RegEx'er like me.
Krzysztof Koźmic created a similar API in 2007. His fluent interface over RegEx looks like this:
Pattern pattern = Pattern.Define().
  As("Kot".Count(Times.AtLeast(2))).
  FollowedBy(Any.Except('a','b','c')).
  Start(At.BeginingOfStringOrLine);
Then Roy Osherove took Josh's API further and took Josh's Fluent Interface to RegEx from 2006 and applied a LINQ query syntax , creating in the process, LINQ to Regex.
Here's Roy's example:
public void FindEmailUsingPattern()
{
  var query = from match in
      RegexQuery.Against("sdlfjsfl43r3490r98*(*Email@somewhere.com_dakj3j")
               where match.Word.Repeat.AtLeast(1)
                   .Literal("@")
                   .Word.Repeat.AtLeast(1)
                   .Literal(".")
                   .Choice.Either(
                        Pattern.With.Literal("com"),
                        Pattern.With.Literal("net"))
                   .IsTrue()
               select match;
   foreach (var match in query)
   {
       Assert.AreEqual("Email@somewhere.com",match.Value);
   }
}
After the "from match in", the simple heart of it is Roy's static Against() call that returns a RegexQuery that is IEnumerable of Match, thereby supporting the foreach later on:
namespace Osherove.LinqToRegex
{
public class RegexQuery : IEnumerable
{
private readonly string input;
private object lastPatternRetVal;
private RegexQuery(string input)
{
this.input = input;
}
public static RegexQuery Against(string input)
{
return new RegexQuery(input);
}
private string _regex;
public RegexQuery Where(Expression<func><pattern,bool> predicate)
{
_regex = new PatternVisitor().VisitExpression(predicate).ToString();
return this;
}
public RegexQuery Select<t>(Expression<func><pattern,t> selector)
{
return this;
}
#region IEnumerable Members
IEnumerator IEnumerable.GetEnumerator()
{
return ((IEnumerable)this).GetEnumerator();
}
public IEnumeratorGetEnumerator()
{
MatchCollection matches = Regex.Matches(input, _regex);
foreach (Match found in matches)
{
yield return found;
}
}
}
}
You can find all the source for Roy's project up at his assembla.com project site and Josh's source is on his blog. It is worth noting, though that you can combine LINQ Queries with Regular Expressions without any tricks because Matches are returned in a MatchCollection an LINQ loves things that are IEnumerable.
You can use LINQ projections to pull objects out of a collection of matches like:
    List<yourType> = (from Match m in matches
                select new YourType
                {
                   Id = m.Groups[1].Value,
                   Something = m.Groups[2].Value
                }).ToList();
So, we've got two sides of the coin here. First, the creation of the Regular Expression. That can be the standard way, or with a fluent interface. Either way, you end up with a string. Second, you've got the extraction of the information. Most often you'll care about the MatchCollection that comes back. You'll usually want to pull information out, so while you're foreach'ing your way over the collection, you can use LINQ to create an object projection that's chopped up and sorted and grouped all with one query, regardless of how you created the query in the first place.
Choice is good.
About Scott
Scott Hanselman is a former professor, former Chief Architect in finance, now speaker, consultant, father, diabetic, and Microsoft employee. He is a failed stand-up comic, a cornrower, and a book author.
About Newsletter

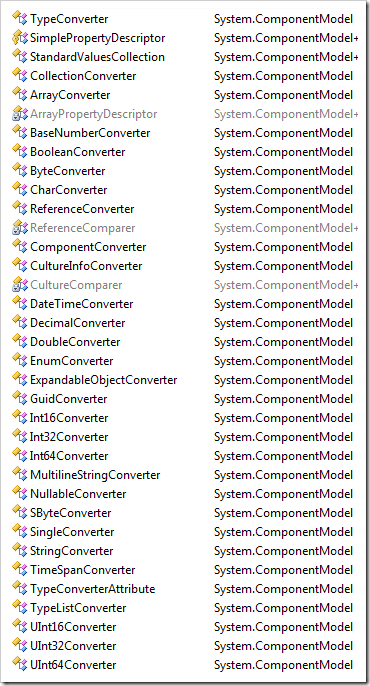 There are lots of standard converters like EnumConvertor, ColorConvertor, and more, all waiting for you in System.ComponentModel as seen in the image at right.
 Download
  Works On My Machine Disclaimer: This is released with exactly zero warranty or support. If it deletes files or kills your family pet, you have been warned. It might work great, and it might not. It hasn't been tested against the myriad of other VS Add-Ins, but it works on my machine in both VS2005 and VS2008. It does look a little odd next to Resharper, a tool that also adds a scrollbar. Good luck.