Scott Hanselman

Building your own Arcade Cabinet for Geeks - Part 1 - The Cabinet

June 06, 2009 Comment on this post [7] Posted in Arcade
Sponsored By

This is the first part of a multi-part series I'm going to do about assembling an Arcade Cabinet for my house. This series has two disclaimers:

Software Disclaimer 1: There's all sorts of legal issues around emulating arcade games. This series of posts has nothing to do with that. I do own some original arcade boards, but if you want to emulate arcade games with MAME (Multiple Arcade Machine Emulator), you can search the 'tubes. What I'm doing here is putting a computer in a pretty box.

Hardware Disclaimer 2: Many folks that build arcade cabinets have a purist view of how these things should be done. They will prefer original Arcade CRT monitors and more expensive, higher quality parts. I am more of a pragmatist. I also have no idea what I'm doing, so I've also got ignorance on my side.

The Point

I have always wanted an Arcade at home. I spent hours wasting nickels, then quarters, then nickels again, at the local arcade. Who wouldn't want one in their house? Well, our spouses, but that's another post.

First step, build or buy? How to start the "Hanselcade?"

The Goal

I decided a few things early on from talking to folks (and you should decide for yourself, also):

  • I wasn't going to build my own cabinet from scratch. I have no wood-working skills, and I was concerned it wouldn't feel "stock" - like a real cabinet. It would look like a wood box with joysticks taped to it, like some that I've seen.
  • I am cheap. One can spend thousands and purchase a complete super-custom cabinet, but that's a little over the top for me. 
  • I wasn't going to build the greatest/largest/most versatile cabinet. I like the look of a single-purpose normal size cabinet, so I decided against any controls other than joysticks. No trackball, spinners, etc.
  • I may want to put an XBox, PS2/3, or other things in the cabinet also. Again, my goal was "a computer in an arcade box" that can play not just arcade games, but also Doom, or whatever. You can buy boards that have some large number of games already installed as well.

The Cabinet

You can build your own Arcade Cabinet using Cabinet Plans and your own wood. There's a lot of free plans and pay plan on the web. Personally, I find most of these plans to be to large and too tall. You have to ask yourself if you want a 2-player or 4 player system. Most of the 4-player ones are VERY large. Additionally, the control panels for those can be extremely wide, especially if you are making a panel that includes not just joysticks, but also trackballs and spinners. You can also buy the kit and assemble it later.

Instead, I decided, along with my friend/helper on this project John Batdorf to start with a REAL antique (wow, I'm old) arcade cabinet, and strip it down. I would compare this decision to refurbishing an antique car, rather than building a kit car.

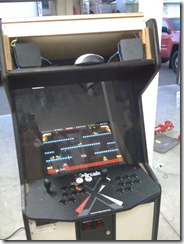
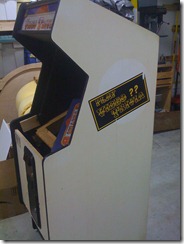
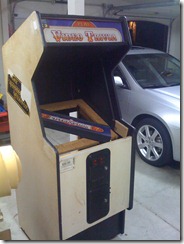
I spent a few weeks searching Craigslist for terms like "MAME" and "Arcade" and found a local guy who had a very old "Video Trivia" game I'd never heard of. Most importantly it didn't work. Always buy ones that don't work and you'll get them cheaper.

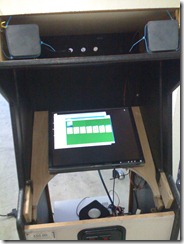
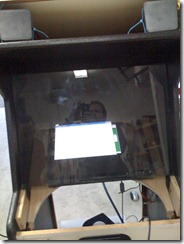
IMG_0034 IMG_0035

Cost: US$100
Cost So Far: US$100

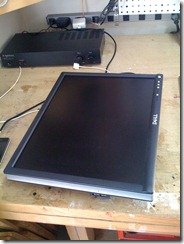
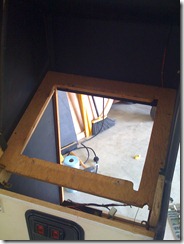
It wasn't much to look at, but it was physically solid. It came with an old CRT, but I accidentally broke it (it hissed air at me) and recycled it. I wasn't planning on using a CRT anyway, as they are not only high-voltage, but also unspeakably heavy.

Aside: This is where I differ from many. While some like the CRT look and authentic feel, I think a high-res LCD is more versatile and soon there will be real-time filters that, if you like, will make your crisp LCD look like an old CRT.

IMG_0038Notice the control panel sitting diagonally in that picture .This is one of the reasons I picked this cabinet. The Video Trivia game had only 5 buttons. No joysticks. As such, the control panel was almost all hole-free steel. In fact, this control panel is as solid as any piece of metal I've ever seen. I planned on using this panel to host my joysticks.

The cabinet also had lot of wires inside that I could piggy back other things on like getting the coin doors working, lights, etc. It was structurally sound, had no bugs living it it, and I could visualize it painted and finished.

Sounds silly, but being able to take an antique and visualize it completed is a big part of picking the right one.

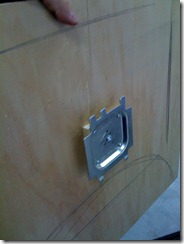
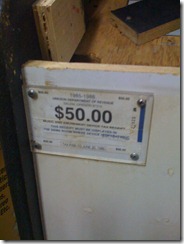
The image at right is of the Oregon State "Music and Amusement Device Tax Receipt." Basically a license to have these. It's from 1985. I don't need a license now, but I like the nostalgic feel of this, so I'm going to keep it.

The Power

IMG_0104I have seen lots of cabinets online created by people who actually know and understand electricity. They come up with a lot of cool and clever ways to mount switches in new places in the cabinet. Since we're putting a computer in there, there will be a power need for a few things.

My electrical skills are limited to amps, volts, ohms, positive and negative. Using these superpowers and a dude from Home Depot, I found this little gem.

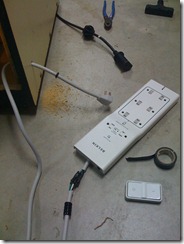
It's a "Belkin Conserve" Energy Strip. In English, it's a power strip with a remote. Bam!

Cost: US$30
Cost So Far: US$130

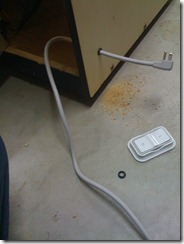
This was perfect. I drilled a 3/8" hole in the cabinet and snipped the cable in two (while unplugged, ahem.) I put the cable through the hole and spliced the cable back together with some wire connector/splicer dealies I got at Radio Shack for a buck.

Cost: US$1
Cost So Far: US$131

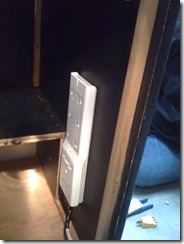
Then using the wall mount on the Belkin, I mounted the power strip on the inside of the cabinet.

 IMG_0105 IMG_0106

The remote control uses a single battery and comes with a holster with sticky tape. That'll go on the top of the cabinet. This was the cheapest and most creative (and clever, I thought) way to make this a "single power button" cabinet.

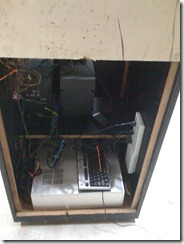
IMG_0107IMG_0108

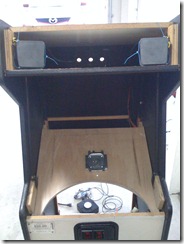
Then I temporarily shoved everything in there to see if it would fit. Probably should have done that first. ;)

Next Up: Mounting the Monitor

  1. Cabinet and Power
  2. Monitor and Mounting
  3. Control Panel
  4. Sound and Lights
  5. Paint and Art
  6. Computer Hardware and Software
  7. Success and Conclusion

About Scott

Scott Hanselman is a former professor, former Chief Architect in finance, now speaker, consultant, father, diabetic, and Microsoft employee. He is a failed stand-up comic, a cornrower, and a book author.

facebook bluesky subscribe
About   Newsletter
Hosting By
Hosted on Linux using .NET in an Azure App Service

How to Remove the .NET ClickOnce Firefox Extension

June 05, 2009 Comment on this post [10] Posted in Microsoft | Open Source
Sponsored By

.NET 3.5 SP1 enables a Firefox Extension that allows .NET applications on Firefox, but its Uninstall button is grayed out.  Since .NET 3.5 SP1 is on Windows Update and is rolling out to more users than ever before, a number of people have noticed this and are frustrated.

Why is the Uninstall button grayed out? What does this add-in do?

Short Version: Remove the .NET Firefox Extension

First: To uninstall completely, if you're running XP or Vista, here's an update that will make the .NET ClickOnce Extension/Addin easily uninstallable by adding on a per-user, rather than per-machine basis. This update will also go out on Windows Update if you prefer to wait. Alternatively, you can click Disable and it won't be loaded.

Longer Version: Some Background and Details

This addin allows users to launch .NET applications from Firefox. The primary issue is that the plugin is enabled at the machine level, rather than the user level. This has the benefit of enabling the Addin for all users, but it as the unfortunate side effect of making the "Uninstall" button grayed out which makes people feel that something sinister has happened or they've lost control.

There are other plugins that use this technique to enable themselves machine-wide, including Google Gears and Java, but I totally understand that some folks don't want certain Firefox Addins enabled.

image

image

This is a tricky situation, because you'll notice that many applications enable browser plugins in similar ways, including, but not limited to:

  • Java
  • VLC Player
  • Adobe Acrobat
  • QuickTime
  • Google Talk
  • iTunes
  • Hulu
  • Picasa

There are lots of other applications that include their own browser addins, many install this same way. Most of these addins are in the "Plugins" tab, rather than the Extensions tab, which might explain why fewer people freak out. 

My point here is that the "Extensions" tab is something that Firefox users, myself included, feel strongly about, while they think less about plugins. Extensions often affect UI and make Firefox personalizable, while Plugins usually enable system-level functionality. It's a subtle difference, but it's significant and important to remember. Extensions are personalization points for Firefox at the User level, and are thought of as such. Some addins (not ours) mark themselves as Hidden, which could be perceived as even more sinister.

Ultimately since many people requested .NET support for Firefox, and we wanted to give it to them, we made this feature. When .NET was updated, this feature was included.

The Future

Here's some more detail and some insight into what we're doing about it.

  • First, this is already fixed in Windows 7 RC. You can uninstall this addin, no problem.
  • Second, for XP and Vista, the update above makes this add-in per-user so it can be easily uninstalled like any other Firefox addin.
    • This update will go out on Windows Update automatically soon. That means. if you already have this add-in, the only visual difference for you will be that the uninstall button will be enabled and you can remove it if you like.
  • Going forward, for .NET 4, the team wants to host this plugin at https://addons.mozilla.org. If you want it you can go get it. If not, no worries. We're still checking on this.

All the Technical Details

In case you want to know the technical details, and in the interest of transparency, it's called "MicrosoftDotNetFrameworkAssistant.xpi." You can rename it to .zip and unzip it. It's got XUL and JavaScript inside - it's just a zip file. If you have made a Firefox add-on, this will look familiar. There's an options dialog, standard stuff, keeping track of two booleans as preferences:

var dotNetAssistantOptions = 
{
onAccept: function()
{
var prefs = this.getPrefs();

var autoLaunchChk = document.getElementById("autolaunch");
prefs.setBoolPref("clickonce.autolaunch", !autoLaunchChk.checked);

var allVersionsChk = document.getElementById("allversions");
prefs.setBoolPref("all_clr_versions_in_useragent", allVersionsChk.checked);

// Update the user-agent if preferences changed
checkCLRVersionString();
return true;
},

onLoad: function()
{
var prefs = this.getPrefs();

var autoLaunchChk = document.getElementById("autolaunch");
autoLaunchChk.checked = !prefs.getBoolPref("clickonce.autolaunch");

var allVersionsChk = document.getElementById("allversions");
allVersionsChk.checked = prefs.getBoolPref("all_clr_versions_in_useragent");
},

getPrefs: function()
{
return Components.classes["@mozilla.org/preferences-service;1"]
.getService(Components.interfaces.nsIPrefService)
.getBranch("microsoft.CLR.");
}
}

There's a contentType handler. This is the meat of it. We see if the mime/type being requested is "application/x-ms-application," indicating the user is trying to launch a .NET ClickOnce application. We then do some path stuff and launch our "sandbox" application that hosts these apps.

var clickOnce = {

dialog_onload: function()
{
// This is the function that would have been called had our overlay not stepped in.
dialog.initDialog();

if (this.isClickOnce())
{
this.prefs = Components.classes["@mozilla.org/preferences-service;1"]
.getService(Components.interfaces.nsIPrefService)
.getBranch("microsoft.CLR.clickonce.");

if (this.prefs.getBoolPref("autolaunch"))
{
this.launch_application();
}
else
{
var button = dialog.dialogElement("launchApplicationButton");
button.collapsed = false;
// If the user has both this addon and FFClickOnce installed show only our button
var ffClickOnceButton = dialog.dialogElement("FFClickOnce-runbutton");
if (ffClickOnceButton)
{
ffClickOnceButton.collapsed = true;
}

// Let the dialog know it must resize to accommodate the new button
dialog.mDialog.sizeToContent();
}
}
},


isClickOnce: function()
{
var mimeInfo = dialog.mLauncher.MIMEInfo;

// Checking the file extension may be second guessing the webserver
// but when 'prompt' is set the user will still have a save button.
if (mimeInfo.MIMEType == "application/x-ms-application" ||
mimeInfo.primaryExtension == "application")
{
return true;
}

return false;
},


launch_application: function()
{
this.execute(this.getPresentationHostLocation(), "-LaunchApplication " + dialog.mLauncher.source.spec);

dialog.mDialog.close();
},

getPresentationHostLocation: function()
{
var nsIProperties = Components.classes["@mozilla.org/file/directory_service;1"]
.getService(Components.interfaces.nsIProperties)

// Attempting to forward-proof this extension by testing for where PresentationHost
// will probably be for CLR 4
var phNewLoc64 = nsIProperties.get("WinD", Components.interfaces.nsILocalFile);
phNewLoc64.appendRelativePath("Microsoft.NET\\Framework64\\wpf\PresentationHost.exe");
if (phNewLoc64.exists())
{
return phNewLoc64;
}

var phNewLoc32 = nsIProperties.get("WinD", Components.interfaces.nsILocalFile);
phNewLoc32.appendRelativePath("Microsoft.NET\\Framework\\wpf\PresentationHost.exe");
if (phNewLoc32.exists())
{
return phNewLoc32;
}

// Fallback to the default location
var phOldLoc = nsIProperties.get("SysD", Components.interfaces.nsILocalFile);
phOldLoc.appendRelativePath("PresentationHost.exe");
return phOldLoc;
},

execute: function(exe, strArgs)
{
// exe should already be an nsILocalFile

// create an nsIProcess
var process = Components.classes["@mozilla.org/process/util;1"]
.createInstance(Components.interfaces.nsIProcess);
process.init(exe);

// Run the process.
// If first param is true, calling thread will be blocked until
// called process terminates.
// Second and third params are used to pass command-line arguments
// to the process.
var args = strArgs.split(" ");
process.run(false, args, args.length);

}

}

There's also a UserAgent module that will optionally append the .NET CLR version to the UserAgent so that websites can detect and show content based on

// Check for updated .NET Framework install on browser startup
checkCLRVersionString();

function checkCLRVersionString()
{
var useragentExtrasPref = Components.classes["@mozilla.org/preferences-service;1"]
.getService(Components.interfaces.nsIPrefService)
.getBranch("general.useragent.extra.");

useragentExtrasPref.QueryInterface(Components.interfaces.nsIPrefBranch2);

// startup check the registry for the latest version of the CLR added to the IE user agent
var versions = getInstalledCLRVersions();

var addonPref = Components.classes["@mozilla.org/preferences-service;1"]
.getService(Components.interfaces.nsIPrefService)
.getBranch("microsoft.CLR.");
addonPref.QueryInterface(Components.interfaces.nsIPrefBranch2);
var allAddonsInAgent = addonPref.getBoolPref("all_clr_versions_in_useragent");
// Allow the user to configure whether they want all version of the CLR in their user agent
// or just the highest.
if (allAddonsInAgent)
{
var appendString = "(";
for (var i=0; i < versions.length; i++)
{
if (i != 0)
{
appendString += "; ";
}
var localVersion = versions[i];
appendString += ".NET " + localVersion[0] + " " + localVersion[1];
}
appendString += ")";

useragentExtrasPref.setCharPref("microsoftdotnet", appendString);
}
else
{
var latestVersion = versions[versions.length-1];
var appendString = "(.NET " + latestVersion[0] + " " + latestVersion[1] + ")";
useragentExtrasPref.setCharPref("microsoftdotnet", appendString);
}
}

function getInstalledCLRVersions()
{
var wrk = Components.classes["@mozilla.org/windows-registry-key;1"]
.createInstance(Components.interfaces.nsIWindowsRegKey);

// Enumerate though the CLR version strings that will be appended to the Internet Explorer user agent
wrk.open(wrk.ROOT_KEY_LOCAL_MACHINE,
"SOFTWARE\\Microsoft\\Windows\\CurrentVersion\\Internet Settings\\5.0\\User Agent\\Post Platform",
wrk.ACCESS_READ);

var clrVersions = new Array();
for (var i=0; i < wrk.valueCount; i++)
{
var name = wrk.getValueName(i);
var matches = name.match("\.NET (CLR|Client) \(.*\)");
if (matches && matches.length > 1)
{
clrVersions.push([matches[1], matches[2]]);
}
}
wrk.close();

clrVersions.sort(function(left, right)
{
if (left[1] < right[1]) return -1;
if (left[1] > right[1]) return 1;
// if version numbers are equal, prefer full CLR over Client sku
if (left[0] == "Client" && right[0] == "CLR") return -1;
if (left[0] == "CLR" && right[0] == "Client") return 1;
return 0;
});
return clrVersions;
}

That's it. Hope this helps. I'll keep my ear to the ground if anything else comes up, so stay tuned.

Related Links

About Scott

Scott Hanselman is a former professor, former Chief Architect in finance, now speaker, consultant, father, diabetic, and Microsoft employee. He is a failed stand-up comic, a cornrower, and a book author.

facebook bluesky subscribe
About   Newsletter
Hosting By
Hosted on Linux using .NET in an Azure App Service

Running a Subversion Server off your Windows Home Server

June 04, 2009 Comment on this post [22] Posted in Home Server | Subversion | Tools
Sponsored By

image Disclaimer - People have been injured and emotionally scarred listening to my technical tips. This may violate your terms of service. If your ISP calls your house and is mean to you, or if you lose all your personal data because of my tips, know that we never spoke. I don't know you. Seriously, who is this?! Stop calling!

I put most of my docs in Live Mesh, and I host must of my Open Source projects at CodePlex, but I have a bunch of code and presentations that usually just float around. Tweet Sandwich is a good example.

I decided I'd try to host a Subversion Server. I don't want to use the machine I host my blog on, as I want the data in my house. Since I already have this lovely Windows Home Server that's saved my marriage, I figured why not host it there?

1. Logging into your Home Server

If you want to install software on your Home Server (and they are headless usually - no monitor) you have to use Remote Desktop. From inside my house, I run "mstsc /console" or "mstsc /admin" from the Start | Run dialog, the connect to my machine called "Server."

2. Install Visual SVN Server

I usually download software to the desktop, ignore the "holy crap don't do this" warning (although be aware) then open an administrator command prompt and run the MSI from there. I downloaded and installed VisualSVN Server, which is the absolute easiest way that I know of to get Subversion (SVN) on Windows. I installed it on the machine on port 8443. That's not 443, but rather 8443. It's kind of like the secondary SSL port. I could put it anywhere, of course, but 8080 is to 80 as 8443 is to 443. It's easy to remember and less likely that your ISP would block it outgoing from your house. You can test if you have open ports with this online tool.

3. Chose Storage and Back It Up

Windows Home Server is a different beast as it supports a RAID-like storage system. You are NEVER supposed to put anything on the D: (Data) drive directly. Always access data through shares like \\server\svnwhatever.

Here's the only/most wonky part of this whole thing. If you have a better idea or you work for the Home Server team, let me know if this is dangerous and I'll update this part of the post.

I made a folder on the D: drive (against recommendations) called D:\repos and I told Subversion that was the place to put stuff. Then I made a new Share called \\SERVER\SVNBackup and set duplicate to true. Then, I installed the Windows 2003 Resource Kit in order to get the RoboCopy tool, and I copied RoboCopy to C:\windows so it's in the path.

Finally, I made a batch file that looked like this:

robocopy /mir d:\repos \\server\svnbackup

This "mirrors" the D:\repos folder to the \\server\svnbackup. I then used the "Add Schedule Task" wizard and made this run every night at 2am. This way I get backup and duplication in a nightly snapshot.

Alternatively, I probably could have mapped a permanent local Z:\ drive on the Home Server to \\server\svn or some share, and told VisualSVN Server to use that. However, that itself seemed wonky? My way seems to work. Thoughts?

image

4. Forward Port

I then logged into my local router and set up a port-forwarding rule to make sure that 8443 was accessible from the outside. Check your router or visit http://192.168.1.1 (usually) to figure it out.

5. Get an External DNS name (Optional)

You can certainly just visit http://www.whatismyipaddress.com and remember your address if you like. You can also hard-code it in your hosts file on the machine that will be your client.

You might consider using a service like DynDNS and get a custom domain like yourname.dyndns.org. There are applets that will run in the tray on your Windows Home Server and keep that IP address in sync if it changes.

Windows Home Server also includes options to get your own Home Server-provided domain under the "Settings" dialog in the Home Server Console. You can be http://foofoo.homeserver.com or a number of choices. This domain name is associated with your Windows Live ID and the IP is automatically updated by the Home Server.

imageNote, you can also log into your Home Server remotely, if you've enabled it. Here's me logging into my Home Server from elsewhere. Notice you can see what machines are online at home in the background there. I can RDP (Remote Desktop Protocol) into those machines if I like, and I can also remote into my Home Server itself.

Incidentally you can also view and download files from your shares, so choose strong passwords.

When you connect to your new Visual SVN Server instance over another port, your browser will likely complain that the certificate isn't trusted and it'll turn your Address Bar red and scary. Bummer, but be aware.

Now I can SVN Checkout https://mymagicdomain.homeserver.com:8443/svn/presentations/trunk as I please.

About Scott

Scott Hanselman is a former professor, former Chief Architect in finance, now speaker, consultant, father, diabetic, and Microsoft employee. He is a failed stand-up comic, a cornrower, and a book author.

facebook bluesky subscribe
About   Newsletter
Hosting By
Hosted on Linux using .NET in an Azure App Service

Bosom Buddies: How to make Google Chrome use Microsoft Bing for Search

June 01, 2009 Comment on this post [27] Posted in Musings
Sponsored By

image Microsoft's new Search Decision Engine called Bing is live now (in preview/beta). I thought Bing meant "Bing Is Not Google" but apparently "bing!" is the "sound of found." Found it! Bing!

If you use Google Chrome as your browser you can make Bing your default search. Here's how:

  1. Click the Wrench Icon in Google Chrome and click Options.
  2. Click "Manage" under Default Search.
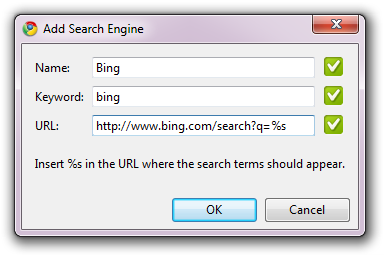
  3. Click "Add" and make the form look like this:
    Add Search Engine
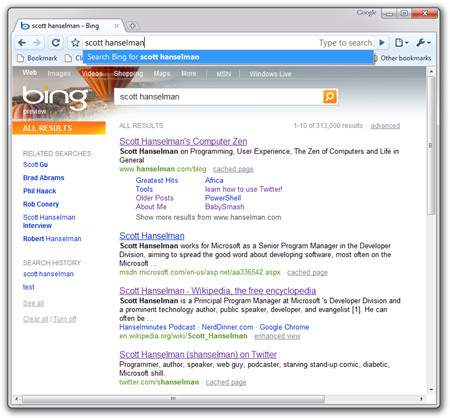
  4. Now with your new Bing entry selected, click Make Default.

scott hanselman - Bing - Google Chrome 

Go give Bing! a try. I'm going to use Bing for the whole month of June and see how it goes. I'll blog my results.

Technical International Note: If you're outside the US, while Bing is rolling out over the next few days (it's literally rolling) you can temporarily force it to think you're in the US with this Bing URL.

Feel free to post your Bing tips and impressions here in the comments, or follow @bing on Twitter.

About Scott

Scott Hanselman is a former professor, former Chief Architect in finance, now speaker, consultant, father, diabetic, and Microsoft employee. He is a failed stand-up comic, a cornrower, and a book author.

facebook bluesky subscribe
About   Newsletter
Hosting By
Hosted on Linux using .NET in an Azure App Service

Adding Custom Search Providers to Windows 7 plus Advanced Search Tricks

May 30, 2009 Comment on this post [7] Posted in Win7
Sponsored By

Disclaimer: Many of my tips have crashed cars, broken lights, and caused lawnmowers to go mad. If anything here seems out of your skill level or at all scary, run screaming away from here, hold your families and friends close; squeeze them tight and never let go. It's not NDA, but it's absolutely FriendDA.

Chris Sells told me at lunch once that he refused to upgrade to Windows 7 because a single feature was remove. His entire workflow, nay, his whole existence, revolved around the "Search the Internet" menu item in the Start Menu. Without this, he would be rendered helpless. This feature was the Red Sun of Krypton and would sap him of all his superpowers.

He would hit the Windows-Key to bring up the Start Menu, type a search term, the click "Search the Internet."

Instead, Windows 7 has "See more results" and shows the search results of his hard drive, then he has to click "Internet" from there.

imageNow, there's certainly ten-thousand ways from 3rd party launchers and Windows Gadgets to search the web from a textbox. You can right-click on the Windows Task Bar and select Toolbars | Address, then when you type in the address bar, just press the up-arrow, then enter...but that's just one way.

Adding "Search The Internet" back to the Start Menu

Personally, I like having more vertical room for local searches in my start menu, but you can put that item back with this Registry Key:

[HKEY_CURRENT_USER\Software\Policies\Microsoft\Windows\Explorer]
"AddSearchInternetLinkInStartMenu"=dword:00000001

That'll make your Start Menu look like this when searching with "Search the Internet" put back. It'll use whatever your default browser is.

image

However, that's just a nit. The REALLY interesting stuff is when you add in custom connectors for search.

OpenSearch and Federated Search Connectors

You can create you own Search Connectors using OpenSearch, just like Long Zheng's Flickr Connector. This lets you search basically anything, directly from Explorer. Here's a search of Flickr from Explorer.

scott hanselman - Search Results in Flickr Search

There's dozens of OpenSearch connectors already out there, many on 7Forums. Then can search for whatever you like, documents, pictures, videos, anything that can be returned in RSS or JSON.

Make Your Own Search Connector

I don't know anyone on the Bing! team and I'm too impatient to wait so I just wrote my own as an example. (Bing launches next week, I hear, so I'm ready.) You can make one today to search your own intranet.

<?xml version="1.0" encoding="UTF-8"?>
<OpenSearchDescription xmlns="http://a9.com/-/spec/opensearch/1.1/" xmlns:ms-ose="http://schemas.microsoft.com/opensearchext/2009/">
<ShortName>Bing!</ShortName>
<Description>Search Bing via Windows 7 Search.</Description>
<Url type="application/rss+xml" template="http://www.bing.com/search?q={searchTerms}&amp;format=rss"/>
<Url type="text/html" template="http://www.bing.com/search?q={searchTerms}"/>
</OpenSearchDescription>

Just from this example, you can see how easy it is. I just saved this as a text file called "Bing.osdx" then double-clicked on it. I got this warning:

Add Search Connector (2)

Then, I could search Bing from Explorer (or add it to my Start Menu as seen further down this post):

hanselman - Search Results in Bing! (2)

But I want to make this even more prominent in my Start Menu.

Pinning Custom Search Connectors to the Start Menu

I (or my admin) have to add a few registry keys. Expect that your Network/Company Administrator will send this to you automatically via Group Policy. Note also that these only work on the Pro SKUs (Pro/Ultimate/Enterprise) not the Home stuff.

Registry Editor (3)

I've added Library0 and Library1 to point to two .searchconnector-ms files. That's what an .osdx file gets renamed to when it's double-clicked on and installed into c:\users\yourname\searches. Then I added "TryHarderPinnedLibrary" as a DWORD with a value of "1".

Now I can "pin" up to 2 (from what I can tell) Search Connectors to my Start Menu, perhaps for an Intranet site, for example.

image

Of course, in this example, "Bing!" and "Search the Internet" are the same thing as one is my default. I may just put MSDN down there instead...hm...there we go...

image

Enjoy! Again, no warranty, I don't know the Win7 team or the Bing team, I just figured this out on the tubes and by using Process Monitor. This may be all lies. Don't listen to me.

Related Links

About Scott

Scott Hanselman is a former professor, former Chief Architect in finance, now speaker, consultant, father, diabetic, and Microsoft employee. He is a failed stand-up comic, a cornrower, and a book author.

facebook bluesky subscribe
About   Newsletter
Hosting By
Hosted on Linux using .NET in an Azure App Service

Disclaimer: The opinions expressed herein are my own personal opinions and do not represent my employer's view in any way.