Scott Hanselman

Adding Reaction Gifs for your Build System and the Windows Terminal

June 25, 2019 Comment on this post [6] Posted in Open Source | PowerShell | Win10
Sponsored By

So, first, I'm having entirely too much fun with the new open source Windows Terminal. If you've got the latest version of Windows (go run Windows Update and do whatever it takes) then you can download the Windows Terminal from the Microsoft Store! This is a preview release (think v0.2) but it'll automatically update, often, from the Windows Store if you have Windows 10 version 18362.0 or higher.

One of the most fun things is that you can have background images. Even animated gifs! You can add those images in your Settings/profile.json like this.

"backgroundImage": "c:/users/scott/desktop/doug.gif",
"backgroundImageOpacity": 0.7,
"backgroundImageStretchMode": "uniformToFill

The profile.json is just JSON and you can update it. I could even update it programmatically if I wanted to parse it and mess about.

BUT. Enterprising developer Chris Duck created a lovely PowerShell Module called MSTerminalSettings that lets you very easily make Profile changes with script.

For example, Mac developers who use iTerm often go to https://iterm2colorschemes.com/ and get new color schemes for their consoles. Now Windows folks can as well!

From his docs, this example downloads the Pandora color scheme from https://iterm2colorschemes.com/ and sets it as the color scheme for the PowerShell Core terminal profile.

Invoke-RestMethod -Uri 'https://raw.githubusercontent.com/mbadolato/iTerm2-Color-Schemes/master/schemes/Pandora.itermcolors' -OutFile .\Pandora.itermcolors
Import-Iterm2ColorScheme -Path .\Pandora.itermcolors -Name Pandora
Get-MSTerminalProfile -Name "PowerShell Core" | Set-MSTerminalProfile -ColorScheme Pandora

That's easy! Then I was talking to Tyler Leonhardt and suggested that we programmatically change the background using a folder full of Animated Gifs. I happen to have such a folder (with 2000 categorized gif classics) so we started coding and streamed the whole debacle on Tyler's Twitch!

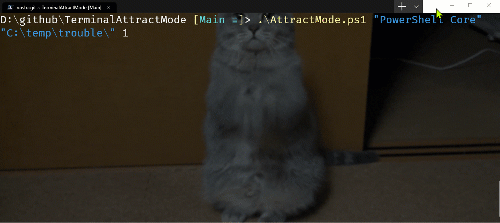
The result is Windows Terminal Attract Mode and it's a hot mess and it is up on GitHub and all set up for PowerShell Core.

Remember that "Attract mode" is the mode an idle arcade cabinet goes into in order to attract passersby to play, so clearly the Terminal needs this also.

./AttractMode.ps1 -name "profile name" -path "c:\temp\trouble" -secs 5

It's a proof of concept for now, and it's missing background/runspace support, being wrapped up in a proper module, etc but the idea is solid, building on a solid base, with improvements to idiomatic PowerShell Core already incoming. Right now it'll run forever. Wrap it in Start-Job if you like as well and can stand it.

The next idea was to have reactions gifs to different developer situations. Break the build? Reaction Gif. Passing tests? Reaction Gif.

Here's a silly proof (not refactored) that aliases "dotnet build" to "db" with reactions.

#messing around with build reaction gifs

Function DotNetAlias {
dotnet build
if ($?) {
Start-job -ScriptBlock {
d:\github\TerminalAttractMode\SetMoodGif.ps1 "PowerShell Core" "D:\Dropbox\Reference\Animated Gifs\chrispratt.gif"
Start-Sleep 1.5
d:\github\TerminalAttractMode\SetMoodGif.ps1 "PowerShell Core" "D:\Dropbox\Reference\Animated Gifs\4003cn5.gif"
} | Out-Null
}
else {
Start-job -ScriptBlock {
d:\github\TerminalAttractMode\SetMoodGif.ps1 "PowerShell Core" "D:\Dropbox\Reference\Animated Gifs\idk-girl.gif"
Start-Sleep 1.5
d:\github\TerminalAttractMode\SetMoodGif.ps1 "PowerShell Core" "D:\Dropbox\Reference\Animated Gifs\4003cn5.gif"
} | Out-Null

}
}

Set-Alias -Name db -value DotNetAlias

I added the Start-job stuff so that the build finishes and the Terminal returns control to you while the gifs still are updating. Runspace support would be smart as well.

Some other ideas? Giphy support. Random mood gifs. Pick me ups. You get the idea.

Later, Brandon Olin jumped in with this gem. Why not get a reaction gif if anything goes wrong in your last command? ERRORLEVEL 1? Explode.

Why are we doing this? Because it sparks joy, y'all.


Sponsor: Looking for a tool for performance profiling, unit test coverage, and continuous testing that works cross-platform on Windows, macOS, and Linux? Check out the latest JetBrains Rider!

About Scott

Scott Hanselman is a former professor, former Chief Architect in finance, now speaker, consultant, father, diabetic, and Microsoft employee. He is a failed stand-up comic, a cornrower, and a book author.

facebook bluesky subscribe
About   Newsletter
Hosting By
Hosted on Linux using .NET in an Azure App Service

You can now download the new Open Source Windows Terminal

June 20, 2019 Comment on this post [27] Posted in Open Source | Win10
Sponsored By

Last month Microsoft announced a new open source Windows Terminal! It's up at https://github.com/microsoft/Terminal and it's great, but for the last several weeks you've had to build it yourself as a Developer. It's been very v0.1 if you know what I mean.

Today you can download the Windows Terminal from the Microsoft Store! This is a preview release (think v0.2) but it'll automatically update, often, from the Windows Store if you have Windows 10 version 18362.0 or higher. Run "winver" to make sure.

Windows Terminal

If you don't see any tabs, hit Ctrl-T and note the + and the pull down menu at the top there. Under the menu go to Settings to open profiles.json. Here's mine on one machine.

Here's some Hot Windows Terminal Tips

You can do background images, even animated, with opacity (with useAcrylic off):

"backgroundImage": "c:/users/scott/desktop/doug.gif",
"backgroundImageOpacity": 0.7,
"backgroundImageStretchMode": "uniformToFill

You can edit the key bindings to your taste in the "key bindings" section. For now, be specific, so the * might be expressed as Ctrl+Shift+8, for example.

Try other things like cursor shape and color, history size, as well as different fonts for each tab.

 "cursorShape": "vintage"

If you're using WSL or WSL2, use the distro name like this in your new profile:

"wsl.exe -d Ubuntu-18.04"

If you like Font Ligatures or use Powerline, consider Fira Code as a potential new font.

I'd recommend you PIN terminal to your taskbar and start menu, but you can run windows terminal from the command "wt" from Windows R or from anotherc console. That's just "wt" and enter!

Try not just "Ctrl+Mouse Scroll" but also "Ctrl+Shift+Mouse Scroll" and get your your whole life!

Remember that the definition of a shell is someone fluid, so check out Azure Cloud Shell, in your terminal!

Windows Terminal menus

Also, let's start sharing nice color profiles! Share your new ones as a Gist in this format. Note the name.

{
"background" : "#2C001E",
"black" : "#4E9A06",
"blue" : "#3465A4",
"brightBlack" : "#555753",
"brightBlue" : "#729FCF",
"brightCyan" : "#34E2E2",
"brightGreen" : "#8AE234",
"brightPurple" : "#AD7FA8",
"brightRed" : "#EF2929",
"brightWhite" : "#EEEEEE",
"brightYellow" : "#FCE94F",
"cyan" : "#06989A",
"foreground" : "#EEEEEE",
"green" : "#300A24",
"name" : "UbuntuLegit",
"purple" : "#75507B",
"red" : "#CC0000",
"white" : "#D3D7CF",
"yellow" : "#C4A000"
}

Note also that this should be the beginning of a wonderful Windows Console ecosystem. This isn't the one terminal to end them all, it's the one to start them all. I've loved alternative consoles for YEARS, whether it be ConEmu or Console2 many years ago, I've long declared that Text Mode is a missed opportunity.

Remember also that Terminal !== Shell and that you can bring your shell of choice into your Terminal of choice! If you want the deep architectural dive, be sure to watch the BUILD 2019 technical talk with some of the developers or read about ConPTY and how to integrate with it!


Sponsor: Get the latest JetBrains Rider with WinForms designer, Edit & Continue, and an IL (Intermediate Language) viewer. Preliminary C# 8.0 support, rename refactoring for F#-defined symbols across your entire solution, and Custom Themes are all included.

About Scott

Scott Hanselman is a former professor, former Chief Architect in finance, now speaker, consultant, father, diabetic, and Microsoft employee. He is a failed stand-up comic, a cornrower, and a book author.

facebook bluesky subscribe
About   Newsletter
Hosting By
Hosted on Linux using .NET in an Azure App Service

Dynamically generating robots.txt for ASP.NET Core sites based on environment

June 18, 2019 Comment on this post [4] Posted in ASP.NET | DotNetCore | Open Source
Sponsored By

I'm putting part of older WebForms portions of my site that still run on bare metal to ASP.NET Core and Azure App Services, and while I'm doing that I realized that I want to make sure my staging sites don't get indexed by Google/Bing.

I already have a robots.txt, but I want one that's specific to production and others that are specific to development or staging. I thought about a number of ways to solve this. I could have a static robots.txt and another robots-staging.txt and conditionally copy one over the other during my Azure DevOps CI/CD pipeline.

Then I realized the simplest possible thing would be to just make robots.txt be dynamic. I thought about writing custom middleware but that sounded like a hassle and more code that needed. I wanted to see just how simple this could be.

  • You could do this as a single inline middleware, and just lambda and func and linq the heck out out it all on one line
  • You could write your own middleware and do lots of options, then activate it bested on env.IsStaging(), etc.
  • You could make a single Razor Page with environment taghelpers.

The last one seemed easiest and would also mean I could change the cshtml without a full recompile, so I made a RobotsTxt.cshtml single razor page. No page model, no code behind. Then I used the built-in environment tag helper to conditionally generate parts of the file. Note also that I forced the mime type to text/plain and I don't use a Layout page, as this needs to stand alone.

@page
@{
Layout = null;
this.Response.ContentType = "text/plain";
}
# /robots.txt file for http://www.hanselman.com/
User-agent: *
<environment include="Development,Staging">Disallow: /</environment>
<environment include="Production">Disallow: /blog/private
Disallow: /blog/secret
Disallow: /blog/somethingelse</environment>

I then make sure that my Staging and/or Production systems have ASPNETCORE_ENVIRONMENT variables set appropriately.

ASPNETCORE_ENVIRONMENT=Staging

I also want to point out what may look like odd spacing and how some text is butted up against the TagHelpers. Remember that a TagHelper's tag sometimes "disappears" (is elided) when it's done its thing, but the whitespace around it remains. So I want User-agent: * to have a line, and then Disallow to show up immediately on the next line. While it might be prettier source code to have that start on another line, it's not a correct file then. I want the result to be tight and above all, correct. This is for staging:

User-agent: *
Disallow: /

This now gives me a robots.txt at /robotstxt but not at /robots.txt. See the issue? Robots.txt is a file (or a fake one) so I need to map a route from the request for /robots.txt to the Razor page called RobotsTxt.cshtml.

Here I add a RazorPagesOptions in my Startup.cs with a custom PageRoute that maps /robots.txt to /robotstxt. (I've always found this API annoying as the parameters should, IMHO, be reversed like ("from","to") so watch out for that, lest you waste ten minutes like I just did.

public void ConfigureServices(IServiceCollection services)
{
services.AddMvc()
.AddRazorPagesOptions(options =>
{
options.Conventions.AddPageRoute("/robotstxt", "/Robots.Txt");
});
}

And that's it! Simple and clean.

You could also add caching if you wanted, either as a larger middleware, or even in the cshtml Page, like

context.Response.Headers.Add("Cache-Control", $"max-age=SOMELARGENUMBEROFSECONDS");

but I'll leave that small optimization as an exercise to the reader.

UPDATE: After I was done I found this robots.txt middleware and NuGet up on GitHub. I'm still happy with my code and I don't mind not having an external dependency, but it's nice to file this one away for future more sophisticated needs and projects.

How do you handle your robots.txt needs? Do you even have one?


Sponsor: Get the latest JetBrains Rider with WinForms designer, Edit & Continue, and an IL (Intermediate Language) viewer. Preliminary C# 8.0 support, rename refactoring for F#-defined symbols across your entire solution, and Custom Themes are all included.

About Scott

Scott Hanselman is a former professor, former Chief Architect in finance, now speaker, consultant, father, diabetic, and Microsoft employee. He is a failed stand-up comic, a cornrower, and a book author.

facebook bluesky subscribe
About   Newsletter
Hosting By
Hosted on Linux using .NET in an Azure App Service

Making a tiny .NET Core 3.0 entirely self-contained single executable

June 13, 2019 Comment on this post [18] Posted in DotNetCore
Sponsored By

I've always been fascinated by making apps as small as possible, especially in the .NET space. No need to ship any files - or methods - that you don't need, right? I've blogged about optimizations you can make in your Dockerfiles to make your .NET containerized apps small, as well as using the ILLInk.Tasks linker from Mono to "tree trim" your apps to be as small as they can be.

Work is on going, but with .NET Core 3.0 preview 6, ILLink.Tasks is no longer supported and instead the Tree Trimming feature is built into .NET Core directly.

Here is a .NET Core 3.0 Hello World app.

225 files, 69 megs

Now I'll open the csproj and add PublishTrimmed = true.

<Project Sdk="Microsoft.NET.Sdk">
<PropertyGroup>
<OutputType>Exe</OutputType>
<TargetFramework>netcoreapp3.0</TargetFramework>
<PublishTrimmed>true</PublishTrimmed>
</PropertyGroup>
</Project>

And I will compile and publish it for Win-x64, my chosen target.

dotnet publish -r win-x64 -c release

Now it's just 64 files and 28 megs!

64 files, 28 megs

If your app uses reflection you can let the Tree Trimmer know by telling the project system about your Assembly, or even specific Types or Methods you don't want trimmed away.

<ItemGroup>
<TrimmerRootAssembly Include="System.IO.FileSystem" />
</ItemGroup>

The intent in the future is to have .NET be able to create a single small executable that includes everything you need. In my case I'd get "supersmallapp.exe" with no dependencies. That's done using PublishSingleFile along with the RuntimeIdentifier in the csproj like this:

<Project Sdk="Microsoft.NET.Sdk">
<PropertyGroup>
<OutputType>Exe</OutputType>
<TargetFramework>netcoreapp3.0</TargetFramework>
<PublishTrimmed>true</PublishTrimmed>
<PublishReadyToRun>true</PublishReadyToRun>
<PublishSingleFile>true</PublishSingleFile>
<RuntimeIdentifier>win-x64</RuntimeIdentifier>
</PropertyGroup>
</Project>

At this point you've got everything expressed in the project file and a simple "dotnet publish -c Release" makes you a single exe!

There's also a cool global utility called Warp that makes things even smaller. This utility, combined with the .NET Core 3.0 SDK's now-built-in Tree Trimmer creates a 13 meg single executable that includes everything it needs to run.

C:\Users\scott\Desktop\SuperSmallApp>dotnet warp
Running Publish...
Running Pack...
Saved binary to "SuperSmallApp.exe"

And the result is just a 13 meg single EXE ready to go on Windows.

A tiny 13 meg .NET Core 3 application

If you want, you can combine this "PublishedTrimmed" object with "PublishReadyToRun" as well and get a small AND fast app.

<Project Sdk="Microsoft.NET.Sdk">
<PropertyGroup>
<OutputType>Exe</OutputType>
<TargetFramework>netcoreapp3.0</TargetFramework>
<PublishTrimmed>true</PublishTrimmed>
<PublishReadyToRun>true</PublishReadyToRun>
</PropertyGroup>
</Project>

These are not just IL (Intermediate Language) assemblies that are JITted (Just in time compiled) on the target machine. These are more "pre-chewed" AOT (Ahead of Time) compiled assemblies with as much native code as possible to speed up your app's startup time. From the blog post:

In terms of compatibility, ReadyToRun images are similar to IL assemblies, with some key differences.

  • IL assemblies contain just IL code. They can run on any runtime that supports the given target framework for that assembly. For example a netstandard2.0 assembly can run on .NET Framework 4.6+ and .NET Core 2.0+, on any supported operating system (Windows, macOS, Linux) and architecture (Intel, ARM, 32-bit, 64-bit).
  • R2R assemblies contain IL and native code. They are compiled for a specific minimum .NET Core runtime version and runtime environment (RID). For example, a netstandard2.0 assembly might be R2R compiled for .NET Core 3.0 and Linux x64. It will only be usable in that or a compatible configuration (like .NET Core 3.1 or .NET Core 5.0, on Linux x64), because it contains native code that is only usable in that runtime environment.

I'll keep exploring .NET Core 3.0, and you can install the SDK here in minutes. It won't mess up any of your existing stuff.


Sponsor: Suffering from a lack of clarity around software bugs? Give your customers the experience they deserve and expect with error monitoring from Raygun.com. Installs in minutes, try it today!

About Scott

Scott Hanselman is a former professor, former Chief Architect in finance, now speaker, consultant, father, diabetic, and Microsoft employee. He is a failed stand-up comic, a cornrower, and a book author.

facebook bluesky subscribe
About   Newsletter
Hosting By
Hosted on Linux using .NET in an Azure App Service

Visual Studio Code Remote Development over SSH to a Raspberry Pi is butter

June 11, 2019 Comment on this post [12] Posted in Hardware | Open Source | Python
Sponsored By

There's been a lot of folks, myself included, who have tried to install VS Code on the Raspberry Pi. In fact, there's a lovely process for this now. However, we have to ask ourselves is a Raspberry Pi really powerful enough to be running a full development environment and the app being debugged? Perhaps, but maybe this is a job for remote debugging. That means installing Visual Studio Code locally on my Windows or Mac machine, then having Visual Studio code install its headless server component (for ARM7) on the Pi.

In January I blogged about Remote Debugging with VS Code on a Raspberry Pi using .NET Core on ARM. It was, and is, a little hacked together with SSH and wishes. Let's set up a proper VS Code Remote environment so I can be productive on a Pi while still enjoying my main laptop's abilities.

  • First, can you ssh into your Raspberry Pi without a password prompt?
    • If not, be sure to set that up with OpenSSH, which is now installed on Windows 10 by default.
    • You know you've got it down when you can "ssh pi@mypi" and it just drops you into a remote prompt.
  • Next, get Visual Studio Code Insiders plus

From within VS Code Insiders, hit Ctrl/CMD+P and type "Remote-SSH" for some of the choices.

Remote-SSH options in VS Code

I can connect to Host and VS Code will SSH into the PI and install the VS Code server components in ~./vscode-server-insiders and then connect to them. It will take a minute as its downloading a 25 meg GZip and unzipping it into this temp folder. You'll know you're connected when you see this green badge as seen below that says "SSH: hostname."

Green badge in VS Code - SSH: crowpi

Then when you go "File | Open Folder" from the main menu, you'll get the remote system's files! You are working and editing locally on remote files.

My Raspberry Pi's desktop, remotely

Note here that some of the extensions are NOT installed locally! The Python language services (using Jedi) are running remotely on the Raspberry Pi, so when I get intellisense, I'm getting it remoted from the actual machine I'm developing on, not a guess from my local box.

Some extentions are local and others are remote

When I open a Terminal with Ctrl+~, see that I'm automatically getting a remote terminal and I've even running htop in it!

Check this out, I'm doing a remote interactive debugging session against CrowPi samples running on the Raspberry Pi (in Python 2) remotely from VS Code on my Windows 10 machine! I did need to make one change to the remote settings as it was defaulting to Python3 and I wanted to use Python2 for these samples.

Remote Debugging a Raspberry Pi

This has been a very smooth process and I remain super impressed with the VS Remote Development experience. I'll be looking at containers, and remote WSL debugging soon as well. Next step is to try C#, remotely, which will mean making sure the C# OmniSharp Extension works on ARM and remotely.


Sponsor: Suffering from a lack of clarity around software bugs? Give your customers the experience they deserve and expect with error monitoring from Raygun.com. Installs in minutes, try it today!

About Scott

Scott Hanselman is a former professor, former Chief Architect in finance, now speaker, consultant, father, diabetic, and Microsoft employee. He is a failed stand-up comic, a cornrower, and a book author.

facebook bluesky subscribe
About   Newsletter
Hosting By
Hosted on Linux using .NET in an Azure App Service

Disclaimer: The opinions expressed herein are my own personal opinions and do not represent my employer's view in any way.