Scott Hanselman

Connecting my Particle Photon Internet of Things device to the Azure IoT Hub

December 20, 2016 Comment on this post [1] Posted in Azure | Hardware
Sponsored By

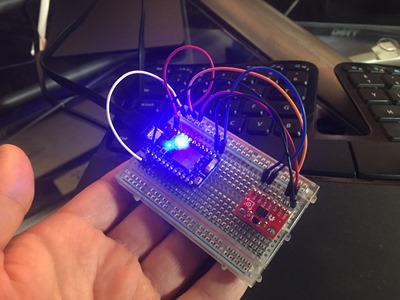
Particle Photon connected to the cloudMy vacation continues. Yesterday I had shoulder surgery (adhesive capsulitis release) so today I'm messing around with Azure IoT Hub. I had some devices on my desk - some of which I had never really gotten around to exploring - and I thought I'd see if I could accomplish something.

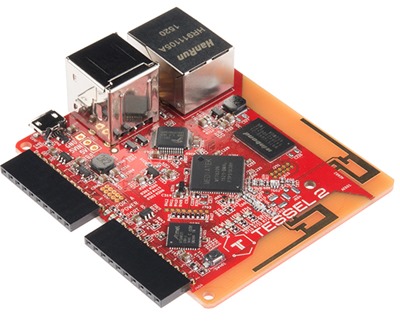
I've got a Particle Photon here, as well as a Tessel 2, a LattePanda, Funduino, and Onion Omega. A few days ago I was able to get the Onion Omega to show my blood sugar on a small OLED screen, which was cool. Tonight I'm going to try to hook the Particle Photon up to the Azure IoT hub for monitoring.

The Photon is a tiny little device with Wi-Fi built-in. It's super easy to setup and it has a cloud-based IDE with tons of examples written in C and Node.js for you to use. Particle Photon also has a node.js based command line. From there you can list out your Photons, see their available functions, and even call functions over the internet! A hacker's delight, to be sure.

Here's a standard "blink an LED" Hello world on a Photon. This one creates a cloud function called "led" and binds it to the "ledToggle" method. Those cloud methods take a string, so there's no enum for the on/off command.

int led1 = D0;
int led2 = D7;
void setup() {
pinMode(led1, OUTPUT);
pinMode(led2, OUTPUT);
Spark.function("led",ledToggle);
digitalWrite(led1, LOW);
digitalWrite(led2, LOW);
}

void loop() {
}

int ledToggle(String command) {
if (command=="on") {
digitalWrite(led1,HIGH);
digitalWrite(led2,HIGH);
return 1;
}
else if (command=="off") {
digitalWrite(led1,LOW);
digitalWrite(led2,LOW);
return 0;
}
else {
return -1;
}
}

From the command line I can use the Particle command line interface (CLI) to enumerate my devices:

C:\Users\scott>particle list
hansel_photon [390039000647xxxxxxxxxxx] (Photon) is online
Functions:
int led(String args)

See how it doesn't just enumerate devices, but also cloud methods that hang off devices? LOVE THIS.

I can get a secret API Key from the Particle Photon's cloud based Console. Then using my Device ID and auth token I can call the method...with an HTTP request! How much easier could this be?

C:\Users\scott\>curl https://api.particle.io/v1/devices/390039000647xxxxxxxxx/led -d access_token=31fa2e6f --insecure -d arg="on"
{
"id": "390039000647xxxxxxxxx",
"last_app": "",
"connected": true,
"return_value": 1
}

At this moment the LED on the Particle Photon turns on. I'm going to change the code a little and add some telemetry using the Particle's online code editor.

Editing Particle Photon Code online

They've got a great online code editor, but I could also edit and compile the code locally:

C:\Users\scott\Desktop>particle compile photon webconnected.ino

Compiling code for photon

Including:
webconnected.ino
attempting to compile firmware
downloading binary from: /v1/binaries/5858b74667ddf87fb2a2df8f
saving to: photon_firmware_1482209089877.bin
Memory use:
text data bss dec hex filename
6156 12 1488 7656 1de8
Compile succeeded.
Saved firmware to: C:\Users\scott\Desktop\photon_firmware_1482209089877.bin

I'll change the code to announce an "Event" when I turn on the LED.

if (command=="on") {
digitalWrite(led1,HIGH);
digitalWrite(led2,HIGH);

String data = "Amazing! Some Data would be here! The light is on.";
Particle.publish("ledBlinked", data);

return 1;
}

I can head back over to the http://console.particle.io and see these events live on the web:

Particle Photon's have great online charts

Particle also supports integration with Google Cloud and Azure IoT Hub. Azure IoT Hub allows you to manage billions of devices and all their many billions of events. I just have a few, but we all have to start somewhere. ;)

I created a free Azure IoT Hub in my Azure Account...

Azure IoT Hub has charts and graphs built in

And made a shared access policy for my Particle Devices.

Be sure to set all the Access Policy Permissions you need

Then I told Particle about Azure in their Integrations system.

Particle has Azure IoT Hub integration built in

The Azure IoT SDKS on GitHub at https://github.com/Azure/azure-iot-sdks/releases have both a Windows-based Azure IoT Explorer and a command-line one called IoT Hub Explorer.

I logged in to the IoT Hub Explorer using the connection string from the Azure Portal:

iothub-explorer login "HostName=HanselIoT.azure-devices.net;SharedAccessKeyName=particle-iot-hub;SharedAccessKey=rdWUVMXs="

Then I'll run "iothub-explorer monitor-events" passing in the device ID and the connection string for the shared access policy. Monitor-events is cool because it'll hang and just output the events as they're flowing through the whole system.

IoTHub-Explorer monitor-events command line

So I'm able to call methods on the Particle using their cloud, and monitor events from within Azure IoT Hub. I can explore diagnostics data and query huge amounts of device-to-cloud data that would potentially flow in from my hardware devices.

The IoT Hub Limits are very generous for free/hobbyist users as we learn to develop. I haven't paid anything yet. However, it can scale to thousands of messages a second per unit! That means millions of messages a second if you need it.

I can definitely see how the the value an IoT Hub solution like this would add up quickly after you've got more than one device. Text files don't really scale. Even if I just IoT'ed up my house, it would be nice to have all that data flowing into a single hub I could manage and query securely.


Sponsor: Big thanks to Telerik! They recently published a comprehensive whitepaper on The State of C#, discussing the history of C#, what’s new in C# 7 and whether C# is the top tech to know. Check it out!

About Scott

Scott Hanselman is a former professor, former Chief Architect in finance, now speaker, consultant, father, diabetic, and Microsoft employee. He is a failed stand-up comic, a cornrower, and a book author.

facebook bluesky subscribe
About   Newsletter
Hosting By
Hosted on Linux using .NET in an Azure App Service

Free Intermediate ASP.NET Core 1.0 Training on Microsoft Virtual Academy

December 20, 2016 Comment on this post [3] Posted in ASP.NET
Sponsored By

At the end of October I announced that Maria from my team and I published a Microsoft Virtual Academy on ASP.NET Core. This Free ASP.NET Core 1.0 Training is up on Microsoft Virtual Academy now for you to watch and enjoy! I hope you like it, we worked very hard to bring it to you.

Again, start with Introduction to ASP.NET Core 1.0, and explore this new technology even further in Intermediate ASP.NET Core 1.0.

Intermediate ASP.NET Core 1.0

Intermediate ASP.NET Core 1.0

We've just launched Day 2, the Intermediate day. If the first is 100 level, this is 200 level. In this day, Jeff Fritz and I build on what we learned with Maria in Day 1. We're also joined by Rowan Miller and Maria later in the day as we explore topics like:

  • Tag Helpers
  • Authentication
  • Custom Middleware
  • Dependency Injection
  • Web APIs
  • Single Page Apps
  • Entity Framework Core and Database Access
  • Publishing and Deployment

In a few weeks (maybe sooner) we'll publish Day 3 which we'll do exclusively on Macs and Linux machines. We'll talk about Cross-Platform concerns and Containers.

NOTE: There's a LOT of quality free courseware for learning .NET Core and ASP.NET Core. We've put the best at http://asp.net/free-courses and I encourage you to check them out!

Also, please help me out by adding a few stars there under Ratings. We're new. ;)


Sponsor: Do you deploy the same application multiple times for each of your end customers? The team at Octopus have taken the pain out of multi-tenant deployments. Check out their latest 3.4 release

About Scott

Scott Hanselman is a former professor, former Chief Architect in finance, now speaker, consultant, father, diabetic, and Microsoft employee. He is a failed stand-up comic, a cornrower, and a book author.

facebook bluesky subscribe
About   Newsletter
Hosting By
Hosted on Linux using .NET in an Azure App Service

Playing with an Onion Omega IoT device to show live Blood Sugar on an OLED screen

December 15, 2016 Comment on this post [6] Posted in Hardware | Open Source
Sponsored By

arduino_lb3dg8I've been playing with IoT stuff on my vacation. Today I'm looking at an Onion Omega. This is a US$19 computer that you can program with Python, Node.js, or C/C++. There's a current IndieGogo happening for the Onion Omega2 for $5. That's a $5 Linux computer with Wi-Fi. Realistically you'd want to spend more and get expansion docks, chargers, batteries, etc, but you get the idea. I got the original Omega along with the bluetooth dongle, Arduino compatible base, tiny OLED screen. A ton of stuff to play with for less than $100.

Note that I am not affiliated with Onion at all and I paid for it with my own money, to use for fun.

One of the most striking things about the Onion Omega line is how polished it is. There's lots of tiny Linux Machines that basically drop you at the command line and say "OK, SSH in and here's root." The Onion Omega is far more polished.

Onion Omega has a very polished Web UI

The Omega can do that for you, but if you have Bonjour installed (for zeroconf networking) and can SSH in once to setup Wi-Fi, you're able to access this lovely web-based interface.

Look at all the info about the Omega's memory, networking, device status, and more

This clean, local web server and useful UI makes the Onion Omega extremely useful as a teaching tool. The Particle line of IoT products has a similarly polished web-interfaces, but while the Onion uses a local web server and app, the Particle Photon uses a cloud-based app that bounces down to a local administrative interface on the device. There's arguments for each, but I remain impressed with how easy it was for me to update the firmware on the Omega and get a new experience. Additionally, I made a few mistakes and "bricked" it and was able - just by following some basic instructions - to totally reflash and reset it to the defaults in just about 10 minutes. Impressive docs for an impressive product.

image

Onion Omega based Glucose Display via NightScout

So it's a cool product, but how quickly can I do something trivial, but useful? Well, I have a NightScout open source diabetes management server with an API that lets me see my blood sugar. The resulting JSON looks like this:

[  
{
"_id":"5851b235b8d1fea108df8b",
"sgv":135,
"date":1481748935000,
"dateString":"2016-12-14T20:55:35.000Z",
"trend":4,
"direction":"Flat",
"device":"share2",
"type":"sgv"
}
]

That number under "sgv" (serum glucose value) is 135 mg/dl. That's my blood sugar right now. I could get n values back from the WebAPI and plot a chart, but baby steps. Note also the "direction" for my sugars is "flat." It's not rising nor falling in any major way.

Let's add the OLED Display to the Onion Omega and show my sugars. Since it's an OpenWRT Linux machine, I can just add Python!

opkg update
opkg install python

Some may (and will) argue that for a small IoT system, Linux is totally overkill. Sure, it likely it. But it's also very productive, fun to prototype with, and functional. Were I to go to market for real, I'd likely use something more hardened.

As I said, I could SSH into the machine but since the Web UI is so nice, it includes an HTML-based terminal!

A Terminal built in!

The Onion Omega includes not just libraries for expansions like the OLED Display, but also command-line utilities. This script clears the display, initializes it, and displays some text. The value of that text will come from my yet-to-be-written python script.

#!/bin/sh    

oled-exp -c

VAR=$(python ./sugar_script.py)

oled-exp -i
oled-exp write "$VAR"

Then in my Python script I could print the value that would be returned into VAR and then printed with the oled-exp command line utility.

OR, I can bypass the shell script entirely and use the Python Module for this OLED screen directly and do this. Grab the JSON, clean it up because apparently the json library sucks (?), then display it.

#!/usr/bin/env python                                                                                                        

from OmegaExpansion import oledExp
import urllib
import json

site="https://hanselmansugars.something/api/v1/entries/sgv.json?count=1"
jfile=urllib.urlopen(site)
jsfile=jfile.read()
jsfile=jsfile.replace("\n","")
jsfile=jsfile.replace("/","")
jsfile=jsfile.replace("]","")
jsfile=jsfile.replace("[","")

a=json.loads(jsfile)
sugar=a['sgv']
direction=a['direction']
info="\n" + str(sugar)+" mg/dl and "+direction

oledExp.driverInit()
oledExp.clear()
oledExp.write(info)

Now here's a pic of my live blood sugar on the Onion Omega with the OLED! I could put this to run on a timer and I'm off to the races.

The OLED Screen says "149 mg/dl and Flat"

The next step might be to clean up the output, parse the date better, and perhaps even dynamically generate a sparkline and display the graphic on the small B&W OLED Screen.

Have you used a small Linux IoT device like the Onion Omega?


Sponsor: Do you deploy the same application multiple times for each of your end customers? The team at Octopus have taken the pain out of multi-tenant deployments. Check out their latest 3.4 release

About Scott

Scott Hanselman is a former professor, former Chief Architect in finance, now speaker, consultant, father, diabetic, and Microsoft employee. He is a failed stand-up comic, a cornrower, and a book author.

facebook bluesky subscribe
About   Newsletter
Hosting By
Hosted on Linux using .NET in an Azure App Service

Exploring Wyam - a .NET Static Site Content Generator

December 11, 2016 Comment on this post [20] Posted in ASP.NET | Open Source
Sponsored By

It's a bit of a renaissance out there when it comes to Static Site Generators. There's Jekyll and GitBook, Hugo and Hexo. Middleman and Pelican, Brunch and Octopress. There's dozens, if not hundreds of static site content generators, and "long tail is long."

Wyam is a great .NET based open source static site generator

Static Generators a nice for sites that DO get updated with dynamic content, but just not updated every few minutes. That means a Static Site Generator can be great for documentation, blogs, your brochure-ware home page, product catalogs, resumes, and lots more. Why install WordPress when you don't need to hit a database or generate HTML on every page view? Why not generate your site only when it changes?

I recently heard about a .NET Core-based open source generator called Wyam and wanted to check it out.

Wyam is a simple to use, highly modular, and extremely configurable static content generator that can be used to generate web sites, produce documentation, create ebooks, and much more.

Wyam is a module system with a pipeline that you can configure and chain processes together however you like. You can generate HTML from Markdown, from Razor, even XSLT2 - anything you like, really. Wyam also integrates nicely into your continuous build systems like Cake and others, so you can also get the Nuget Tools package for Wyam.

There's a few ways to get Wyam but I downloaded the setup.exe from GitHub Releases. You can also just get a ZIP and download it to any folder. When I ran the setup.exe it flashed (I didn't see a dialog, but it's beta so I'll chalk it up to that) and it installed to C:\Users\scott\AppData\Local\Wyam with what looked like the Squirrel installer from GitHub and Paul Betts.

Wyam has a number of nice features that .NET Folks will find useful.

Let's see what I can do with http://wyam.io in just a few minutes!

Scaffolding a Blog

Wyam has a similar command line syntax as dotnet.exe and it uses "recipes" so I can say --recipe Blog and I'll get:

C:\Users\scott\Desktop\wyamtest>wyam new --recipe Blog
Wyam version 0.14.1-beta

,@@@@@ /@\ @@@@@
@@@@@@ @@@@@| $@@@@@h
$@@@@@ ,@@@@@@@ g@@@@@P
]@@@@@M g@@@@@@@ g@@@@@P
$@@@@@ @@@@@@@@@ g@@@@@P
j@@@@@ g@@@@@@@@@p ,@@@@@@@
$@@@@@g@@@@@@@@B@@@@@@@@@@@P
`$@@@@@@@@@@@` ]@@@@@@@@@`
$@@@@@@@P` ?$@@@@@P
`^`` *P*`
**NEW**
Scaffold directory C:/Users/scott/Desktop/wyamtest/input does not exist and will be created
Installing NuGet packages
NuGet packages installed in 101813 ms
Recursively loading assemblies
Assemblies loaded in 2349 ms
Cataloging classes
Classes cataloged in 277 ms

One could imagine recipes for product catalogs, little league sites, etc. You can make your own custom recipes as well.

I'll make a config.wyam file with this inside:

Settings.Host = "test.hanselman.com";
GlobalMetadata["Title"] = "Scott Hanselman";
GlobalMetadata["Description"] = "The personal wyam-made blog of Scott Hanselman";
GlobalMetadata["Intro"] = "Hi, welcome to my blog!";

Then I'll run wyam with:

C:\Users\scott\Desktop\wyamtest>wyam -r Blog
Wyam version 0.14.1-beta
**BUILD**
Loading configuration from file:///C:/Users/scott/Desktop/wyamtest/config.wyam
Installing NuGet packages
NuGet packages installed in 30059 ms
Recursively loading assemblies
Assemblies loaded in 368 ms
Cataloging classes
Classes cataloged in 406 ms
Evaluating configuration script
Evaluated configuration script in 2594 ms
Root path:
file:///C:/Users/scott/Desktop/wyamtest
Input path(s):
file:///C:/Users/scott/.nuget/packages/Wyam.Blog.CleanBlog.0.14.1-beta/content
theme
input
Output path:
output
Cleaning output path output
Cleaned output directory
Executing 7 pipelines
Executing pipeline "Pages" (1/7) with 8 child module(s)
Executed pipeline "Pages" (1/7) in 221 ms resulting in 13 output document(s)
Executing pipeline "RawPosts" (2/7) with 7 child module(s)
Executed pipeline "RawPosts" (2/7) in 18 ms resulting in 1 output document(s)
Executing pipeline "Tags" (3/7) with 10 child module(s)
Executed pipeline "Tags" (3/7) in 1578 ms resulting in 1 output document(s)
Executing pipeline "Posts" (4/7) with 6 child module(s)
Executed pipeline "Posts" (4/7) in 620 ms resulting in 1 output document(s)
Executing pipeline "Feed" (5/7) with 3 child module(s)
Executed pipeline "Feed" (5/7) in 134 ms resulting in 2 output document(s)
Executing pipeline "RenderPages" (6/7) with 3 child module(s)
Executed pipeline "RenderPages" (6/7) in 333 ms resulting in 4 output document(s)
Executing pipeline "Resources" (7/7) with 1 child module(s)
Executed pipeline "Resources" (7/7) in 19 ms resulting in 14 output document(s)
Executed 7/7 pipelines in 2936 ms

I can also run it with -t for different themes, like "wyam -r Blog -t Phantom":

Wyam supports themes

As with most Static Site Generators I can start with a markdown file like "first-post.md" and included name value pairs of metadata at the top:

Title: First Post
Published: 2016-01-01
Tags: Introduction
---
This is my first post!

If I'm working on my site a lot, I could run Wyam with the -w (WATCH) switch and then edit my posts in Visual Studio Code and Wyam will WATCH the input folder and automatically run over and over, regenerating the site each time I change the inputs! A nice little touch, indeed.

There's a lot of cool examples at https://github.com/Wyamio/Wyam/tree/develop/examples that show you how to generate RSS, do pagination, use Razor but still generate statically, as well as mixing Razor for layouts and Markdown for posts.

The AdventureTime sample is fairly sophisticated (be sure to read the comments in the config.wyam for gotcha) example that includes a custom Pipeline, use of Yaml for front matter, and mixes markdown and Razor.

There's also a ton of modules you can use to extend the build however you like. For example, you could have source images be large and then auto-generate thumbnails like this:

Pipelines.Add("Images",
ReadFiles("*").Where(x => x.Contains("images\\") && new[] { ".jpg", ".jpeg", ".gif", ".png"}.Contains(Path.GetExtension(x))),
Image()
.SetJpegQuality(100).Resize(400,209).SetSuffix("-thumb"),
WriteFiles("*")
);

There's a TON of options. You could even use Excel as the source data for your site, generate CSVs from the Excel OOXML and then generate your site from those CSVs. Sounds crazy, but if you run a small business or non-profit you could quickly make a nice workflow for someone to take control of their own site!

GOTCHA: When generating a site locally your initial reaction may be to open the /output folder and open the index.html in your local browser. You MAY be disappointed with you use a static site generator. Often they generate absolute paths for CSS and Javascript so you'll see a lousy version of your website locally. Either change your templates to generate relative paths OR use a staging site and look at your sites live online. Even better, use the Wyam "preview web server" and run Wyam with a "-p" argument and then visit http://localhost:5080 to see your actual site as it will show up online.

Wyam looks like a really interesting start to a great open source project. It's got a lot of code, good docs, and it's easy to get started. It also has a bunch of advanced features that would enable me to easily embed static site generation in a dynamic app. From the comments, it seems that Dave Glick is doing most of the work himself. I'm sure he'd appreciate you reaching out and helping with some issues.

As always, don't just send a PR without talking and working with the maintainers of your favorite open source projects. Also, ask if they have issues that are friendly to http://www.firsttimersonly.com.


Sponsor: Big thanks to Redgate! Help your team write better, shareable SQL faster. Discover how your whole team can write better, shareable SQL faster with a free trial of SQL Prompt. Write, refactor and share SQL effortlessly, try it now!

About Scott

Scott Hanselman is a former professor, former Chief Architect in finance, now speaker, consultant, father, diabetic, and Microsoft employee. He is a failed stand-up comic, a cornrower, and a book author.

facebook bluesky subscribe
About   Newsletter
Hosting By
Hosted on Linux using .NET in an Azure App Service

Awesome, legal, wireless retrogaming with a Hyperkin Retron 5 and 8bitdo's nes30pro

December 09, 2016 Comment on this post [7] Posted in Gaming
Sponsored By

Hyperkin Retron 5 is amazing with an 8bitdo nes30pro!My kids and I are big fans of retrogaming. We have a whole collection of real consoles including N64, Dreamcast, PS2, Genesis, and more. However, playing these older consoles on new systems often involves a bunch of weird AV solutions to get HDMI out to your TV. Additionally, most retro controllers don't have a wire that's long enough for today's 55" and larger flatscreens.

We wanted a nice solution that would let us play a bunch of our games AND include a wireless controller option. Here's the combination of products that we ended up with for retrogaming this Christmas season.

Hyperkin Retro Console

There's a company called Hyperkin that makes a series of retro-consoles. They've got the Hyperkin Retron 2, Hyperkin Retron  3, and my favorite (and the one YOU should get) the Hyperkin Retron 5. You'd think the Hyperkin 5 would let you play five consoles, but it actually lets you play NES, SNES, Super Famicom, Genesis, Mega Drive, Famicom, Game Boy, Game Boy Color, and GBA (Gameboy advance) cartridges on one system. It has five slots. ;)

Everyone's talking about how they can't find the NES Classic Edition. I'd spend that money on a Hyperkin and then go out and buy a few actual game carts from your local retro gaming shop.

I like the Hyperkin Retron 5 over the lesser models for a few reasons.

  • It outputs HDMI natively for all it's emulated consoles.
  • It's got great firmware that is updated fairly often.
  • Its firmware has video features like adding fake CRT scanlines for authenticity (we like playing that way)
  • It supports cheats ;)
  • It's got multiple, real ports that support your existing console gamepads
  • You can use one system's controller for another. For example, a SNES gamepad on an NES game.

The only bad things about the Hyperkin Retron 5 is that the included controller kind of sucks and with all console games, you need to be fairly careful inserting and removing the cartridges.

8bitdo NES30 Pro Game Controller

You might assume the 8bitdo NES30 Pro Game Controller would be a cheap overseas knockoff controller but it's REALLY well made and it's REALLY more useful than I realized when I got it!

8bitdo controller

There are a number of these controllers from this company. The NES30 is nice but the NES30 Pro includes two analog sticks while still keeping the classic style. Think of it as almost a portable Xbox 360 controller! In fact, when you plug it into your PC with a USB cable it shows up as an Xbox 360 controller! That means it works great for Steam games. I've been carrying it in my bag on trips and gaming on my laptop.

for-pcThe build quality of the pad is great, but it's the extendable firmware that really makes the 8bitdo NES30 Pro shine. It has support to act as a Wiimote and even custom firmware for a...wait for it...Retron 5 mode! This means you can use this controller as a replacement for the Retron and play all the consoles it supports.

Even better, the 8bitdo NES30 Pro Game Controller also supports iOS, Android, etc. It's really just about perfect. My only complaint is that you have to turn it on while holding certain buttons in order to start in the various modes. So there's Bluetooth mode, iOS mode, Xbox mode, etc. Not a huge deal, but I've printed out the manual to keep it all straight.

8bitdo Controller Wireless Receiver

Here's where the magic happened. Because the 8bitdo NES30 Pro is a Bluetooth device, there's wireless receivers available for it for most consoles! If you have an NES or you managed to find an NES Classic, there's an 8bitdo Retro Receiver for NES.

However, I recommend you get the 8bitdo Bluetooth SNES Retro Receiver and plug it into the Hyperkin Retron 5. This, for us, has been the sweet spot. It works great with all games and we've got HDMI output from the Retron while still being able to sit back on the couch and game. You can also get two if you like and play multiplayer. As for power, the receiver needs just 100mA and leeches that power from the SNES port.

Even better, this Retro Receiver lets you use existing controllers as wireless controllers to whatever! So you can use your Wii U or PS3 controllers (since they are Bluetooth!) and retrogame with those.

If that wasn't awesome enough, the Retro Receiver can act as a generic "X-Input" controller for your PC or Mac. You plug an included Micro-USB cable into it and then pair your PS3, PS4, or Wii Remote into your computer and use it!

To be clear, I have no relationship with the 8bitdo company but everything they make is gold.


Sponsor: Big thanks to Redgate! Help your team write better, shareable SQL faster. Discover how your whole team can write better, shareable SQL faster with a free trial of SQL Prompt. Write, refactor and share SQL effortlessly, try it now!

About Scott

Scott Hanselman is a former professor, former Chief Architect in finance, now speaker, consultant, father, diabetic, and Microsoft employee. He is a failed stand-up comic, a cornrower, and a book author.

facebook bluesky subscribe
About   Newsletter
Hosting By
Hosted on Linux using .NET in an Azure App Service

Disclaimer: The opinions expressed herein are my own personal opinions and do not represent my employer's view in any way.